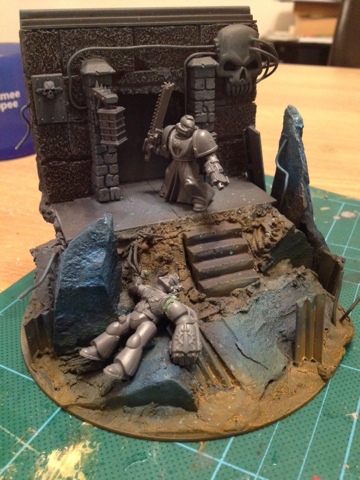
The base is now, however, finished. It now seems like a good time to explain why I've done it the opposite way round to before. Those of you who saw the VSF diorama under construction - back at the very beginning of this blog - or the Folk Horror one which followed will have seen that I sketched out the basic look then constructed and painted the miniatures. This was perfectly fine but I started thinking about a different approach. If you're not interested in my musings, feel free to just skip down and look at the pretty pictures.
In a previous life I was a photographer; in the life before that I was an actor and director. The visual sense of the photography has informed all my dioramas (indeed this one, if you look at the ratios, is an almost perfect portrait orientation and uses classic leading lines) but there was something nagging at me about the figures.
The problem was that I had figures and then a landscape and the two didn't quite match. The only one that looked as though he really belonged was the legless zombie in the folk horror one and that was because he was constructed last after the slope was made so that I could get the angle of his head right.
As an actor, you're looking for a dynamic way to use the performance space: whether it's the furniture that's there or different levels, you're using the space to communicate the emotion you want the audience to read.
So this time I built the location and now I'm starting to make the figures. As they are being constructed to fit within the environment I'm starting to get more dynamic poses. Whereas before I would more or less stick the figures together right out of the box, here I'm having to cut-and-shut to ensure that the body is turned the right way, the arm is pointing in the right direction, the head is tilted for the right line of sight...
Rather than try and explain it further, I'll invite you to look at the pictures below to see what I mean, and compare them with the two posted previously. And my question to those of you that make dioramas is this - which way round do you do it and why?
...and here is the detailing. All junk from the bits box and some gardening wire left over from training some Firethorns.
The finished thing...
While I had the airbrush out I used some of the leftover colours from the Carnosaur to tint the undercoat:
So the next step will be constructing the attackers and then deciding on the colour palette.
Total cost: £0.


