Projects

Thursday, 31 December 2015

Carnosaur

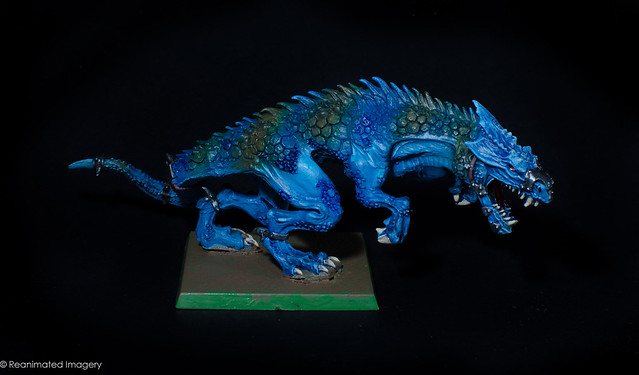
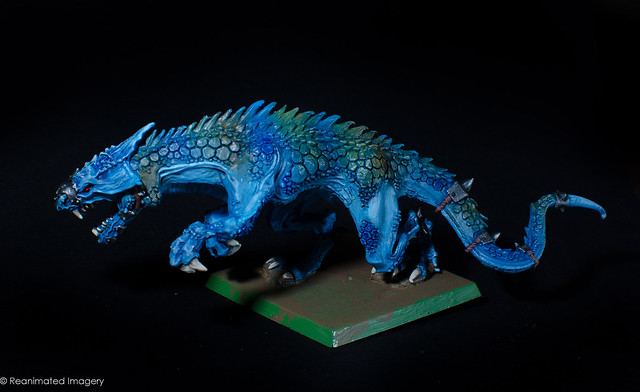
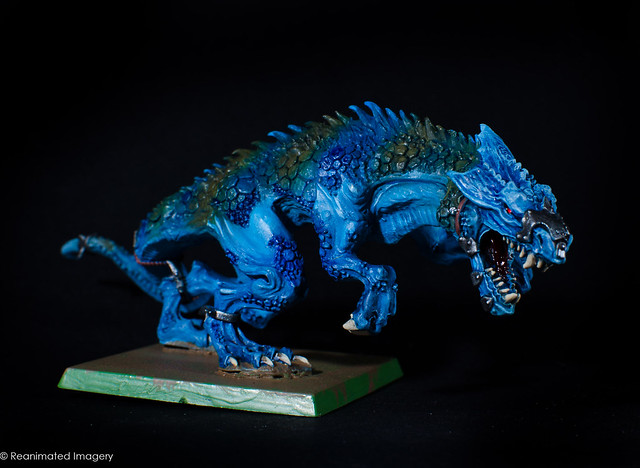
Well, it's finally finished. I need to figure out a saddle and choose which of my old miniatures will get the honour of riding it into battle at the head of my Evil Dragon Rampant force.

To recap (the good pictures are at the bottom if you want to scroll down):

 It arrived looking like this:


Stripped and scraped away:


Overall colour scheme was to match this:


Base coat was done with the airbrush:


and now the final shots:


Carnosaur III

Carnosaur II

Carnosaur I

Monday, 28 December 2015

As one door closes...

So the viper is done. Just the beauty shots to do:


While waiting for the Klear coat to dry I was also able to finish off the Carnosaur:


I'll do a summary post on that with a collection of all the process pictures on the next couple of days. 

And finally I stuck together this little laughing chap: 


So he's up next as I start on the Cylon Raider. 

If I don't get anywhere with that before let me wish everyone a happy new year!

Sunday, 27 December 2015

So Say We All

MERRY CHRISTMAS EVERYONE!

Nearly done with the Viper. There's just a final clear coat and then weathering to do. The Christmas haul this month was more models than gaming or miniatures as I'm going to try and whittle down the lead pile this year a bit rather than adding to it.

Hopefully normal painting updates will be resumed in a few days as the Carnosaur is finally nearing completion.

The painting of the Viper was fairly simple airbrushing. I decided to paint the stripes as it would make it easier to weather them. After masking off the strips I added maskol - you can see it on the pictures as purple dots - which is simply liquid latex. After the painting, just rub the maskol off and voila! instant wearing.


Did some gross weathering at this stage by sanding the paintwork back down to the grey primer.


Decals added:


Next project beyond a couple of 28mm miniatures:


Saturday, 19 December 2015

Fill Er Up

One of the banes of any model kit is filling seams or joins. No matter how well engineered the kit, once a ham-fisted gorilla like me gets their hands on it there will be a visible join. 

Always before I've used car filler which had the virtue of being cheap but can't really be applied to miniatures. 

Now I've found something that can. 


This is Vallejo putty. It's basically plastic in a load of poly cement. All you do it squeeze it out


Smooth it down


And then sand it. 


This is will work on large plastic miniatures as well; it will also be a lot cheaper than greenstuff, I think. It's also got some fairly
Obvious possibilities for terrain and dioramas.  Next set of plastic miniatures or conversions I use I'll give it a try and report back. 

Sunday, 13 December 2015

All of this has happened before...

...and all of this has happened again. 

Made a lot of progress on the Viper. First, I built a very simple circuit with five LEDs in parallel; two for the cockpit and 3 for the engines. 


Next - and an often overlooked step - is to paint the inside of the hull with black paint for lightblocking. I also glued some foil in to make sure. 


Next I installed the cockpit and the start of the wiring loom:


And a test of the cockpit lighting:


Next step is putting together the rest of the hull and arranging the engine lights:


And, as you can see, the overall shape is starting to look rather familiar. 


Hopefully I'll be able to get it primed and start airbrushing next week. 

I also discovered a new little thing which has definite possibilities if applied to miniatures: I'll pop a product review up tomorrow.