As I have mentioned before when I built that bloody submarine, Airfix' idea of Skill Level 1 and mine are very, very different. This kit led to just as much swearing as the last one.
One of the advantages of being a miniatures painter, of course, is that 1/72nd scale pilots and cockpits cause us no fear:
And here's ashot with the flash to show the ridiculously small decal sheet:
The other skill I wanted to work on was masking. As it turns out, I didn't leave the cockpit frame unmasked which is something to remember for the future. The gun on the port wing, by the way, is a small bit of sprue carved to match the other. The actual piece is somewhere in the carpet.
Here is the preshading technique again. Nothing too difficult if you've had a bit of practice with your airbrush.
And, as you can see, very effective with the light colour of the underside.
And equally effective with the top. Just to emphasise - there is no highlighting here. Just the preshade and a delicate application of the base coat, thicker at the centre of the panels.
The nicest thing about an airbrush is, of course, that it makes camo-spraying very easy.
And the masking worked!
And a daylight colour check:
At this point I started adding gross weathering such as paint chips on leading edges and foot wear where the pilots would be climbing in and out.
Now this was the acid test. The old Klear made cockpit canopies look thinner. Not idea why or how, but it did. Would Pledge Wax do the same?
Yes:
As you can see here, the gloss coat really helped the decals adhere to the surface detail:
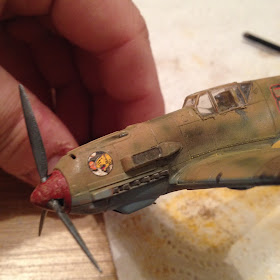
And then pastel weathering:
This one will be going in to work - when it's based - where it'll get used for the WW1/WW2 controlled assessment.
Up next is the Top Sekret Project which is, of course, sekret no longer:
I'm currently faffing about with bits of wire and fibre optic to work out how to light this little beauty.


Now I want to build something! Great job Sir.
ReplyDeleteWait until you see the Vietnam one I'm going to make for Paper 2.
DeleteThat's some excellent work! Been following this over on Facebook
ReplyDelete