Television is rather a frightening business. But I get all the relaxation I want from my collection of model soldiers.
Peter Cushing

Thursday, 30 May 2019

The Future is Now

The other thing that's been keeping me occupied alongside my new Napoleonic project was a new bit of kit. Having played with them at work quite a lot I decided it was time to get myself a 3d printer.

Building it was the first job - and as it was a job requiring quite a degree of precision it was quite outside my usual slapdash wheelhouse - and then working out what to print.


I started simply with some Necromunda walls; the first test piece was successful so I will be printing a full set of these in due course.


Next, a dragon for my youngest to test organic shapes. Pretty good again and a couple of important lessons learned about how to slice the projects for printing.


Finally, a house. This will have three stories, including interior details. This has obvious applications for AoS, Middle Earth, Mordeim and Historical.


All of the above were from a single roll of filament; about 750g in total, so cost about £10. The electricity cost is negligible, about the same as an old 60w incandescent lamp. Overall I am very impressed; as long as you have good stl files to work with, the possibilities are endless. It's like have a Star Trek replicator for wargames terrain. 

The first major project will be, I think, the gatehouse to match the medieval house and then a full set of Necromunda walls. Then I think I'll be looking for a model of the Nostromo....

Wednesday, 29 May 2019

"The Scum of the Earth"

"The French system of conscription brings together a fair sample of all classes; ours is composed of the scum of the earth — the mere scum of the earth. It is only wonderful that we should be able to make so much out of them afterwards."
-Arthur Wellesley, 1813


Starting a new project is always fun. I currently have two new projects on the go, the first of which is 28mm Napoleonics.


I'm starting with the British - specifically the South Essex (latterly the Prince Of Wales' Own Volunteers).

These are a mix of Perry and Warlord plastics to provide some variation in height; I also painted various shades across the two ranges to ensure that there were subtle variations in colours to reflect the fact they've been in the field for a while.


Batch painting has always been my weakness so this was all about finding a system that wasn't too painful. The old lollystick approach and lots of washes and glazes was the main way although I am looking forward to the new Citadel Contrast paints as I reckon these will speed things up enormously.


Next up some

Friday, 26 April 2019

The Way Is Shut

"The way is shut. It was made by those who are Dead, and the Dead keep it, until the time comes. The way is shut."


This was another simple painting project after the massive conversion job on the Knight. I've been meaning to get round to these for a while - indeed I played with some Glow In the Dark pigment for them a while ago  - but in the event I decided to just crack out the airbrush.


Three colours mixed in various shades for coats, a wash and then a final highlight over spray and voila! Two complete warbands of the Dead of Dunharrow.


Wednesday, 24 April 2019

"Stay on target... stay on target..."


After finishing the massive project that was the Chaos Knight I needed a little palate cleanser so knocked off this lovely little Bandai kit. Don't let the tiny size fool you (yes, that is a penny!). It went together like a dream and was a joy to paint.

Weathering was.by doing a base coat of dark grey and then sponging liquid mask on before applying the main coat.

Saturday, 20 April 2019

The FleshEngine


Through the smoke and the mud and the blood thundered the GodEngines of the Mechanicum and and we followed on behind. The heretics and infidels could not stand against us. Until the day we learned that not all the Noble Knights had remained loyal to the Goldem Throne. Until the day we met the Fleshengine. It stalked through the ranks of our men, and where its trunklike legs of iron struck the men were sucked into the armour, screaming as they were wrapped in tendrils of iron. Where the men were spat in, rugose demons emerged from the carapace of the unholy thing as tiny creatures capered over its armour. An entire battalion of Guardsmen fell to it, blown apart, ripped asunder or torn into unholy twisted versions of humanity. And then, then this broodmother, this fleshengine, turned on our Knights. I had never heard metal scream before that day. 

Now I can hear nothing else in the night. The screaming of Knights. 


I had the chassis of a Knight left and I had always intended to create chaos version, but it wasn't until I looked closely at the Mephitic Blight Hauler kit that I figured out how to do the 'face'. Once I had that the rest sort of fell into place. 

This has been a massive project, so I apologise for the amount of photos and the length of the post, but this has been about three weeks on an off so I collected a lot of information. 

Step one was to cut out the face of the Blight Hauler. I also turned around the mouth parts and fastened them in to create a lower jaw. 

Using the dryad sprues I added some nurgly growth to the main body in various places.


This was probably the fiddliest bit of the conversion - I cut the joints of the fingers and remodelled the hand so it was pointing. 


Then I used a combination of foil and plastic putty to create an organic neck to fill where the new head would attach - you can barely see it on the finished model but leaving a gap would have felt very, very wrong. 


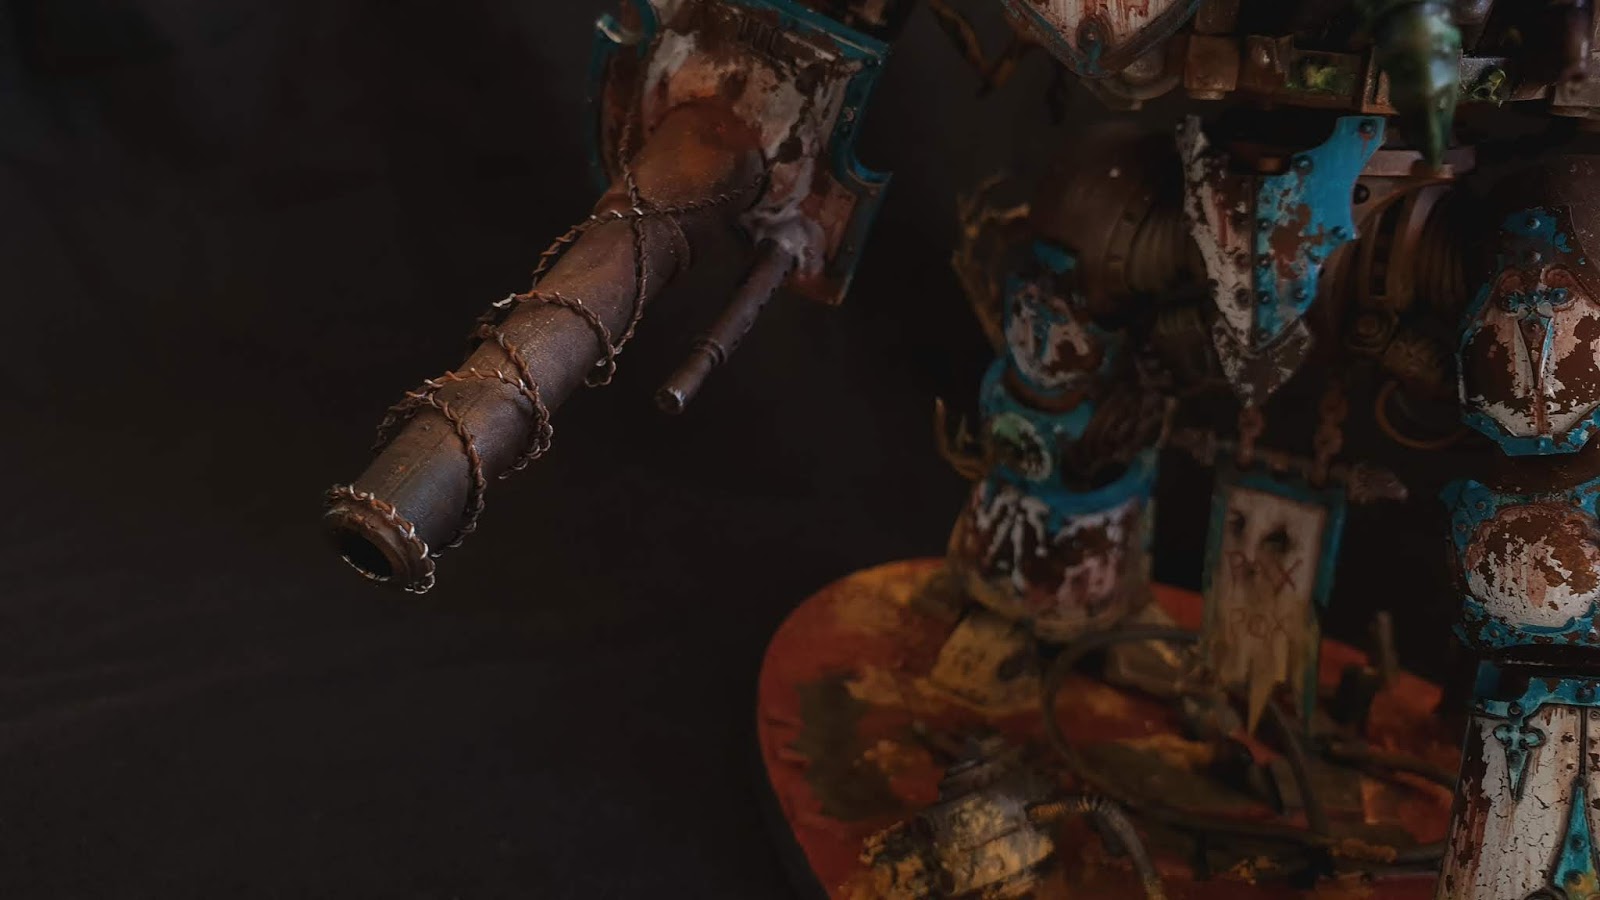
I wrapped barbed wire round lots of bits of the body - like this carapace cannon which I ended up leaving off. 


The chap being absorbed was a left over catachan who was sawn on a diagonal. Barbed wire was added for that Hellraiser touch and his shoulder joint was rebuilt so he was reaching out. 


Then painting the whole thing in my rust colours and airbrushing a coat of chipping medium over the top. I've also been playing with masking fluid on another project but for this chipping fluid was the definite tool for the job. 


A trick I learned last time was that if you apply the chipping medium very thick and don't let it dry before you add the top coat, the top coat splits and cracks. This is a very handy bit of information if you want to happen on purpose. 


Then I added the trim. If anyone is interested, the colour scheme is House Hawkwood from Fading Suns. 


Then, once it has dried, time to attack it with a toothbrush. 


Then it was a case of painting details...


And adding weathering using pigments and airbrush thinner.


I added some rigging and banners, just for fun and visual interest. 


I detailed the base with various bits of junk and the head I didn't use. 


This is going to be entered into a painting competition, so wish me luck!