Television is rather a frightening business. But I get all the relaxation I want from my collection of model soldiers.
Peter Cushing
Showing posts with label knights. Show all posts

Sunday, 23 February 2020

Fearsome Engines

"The Legio Pythia - known colloquially as the Noctis Pythonis, the Night Witches - saw heavy fighting along the spinward front. The specialised in devastating hit and fade attacks previously thought impossible with Titans. Although many of their forces were lighter Reaver and Warhound pattern engines, the Traitor Legios quickly learned to fear the appearance of a Warlord in the Purple and Black livery of the Night Witches." 

From Fearsome Engines: A History of the Legios on the Spinward Marches, Ayjaypee T'Lar, Mars University Press, m40.231


As a youth in the late 80s I had many a fun afternoon playing Adeptus Titanticus. Epic never really got a handle on me, but the simple joy of tooling around a city with a giant stompy robot and smacking seven bells out of other giant stompy robots went straight to the Godzilla part of my brain.

Unfortunately the rereleased version of the game last year was massively too expensive for me to buy. But this last week they released a new starter set with four titans, two knights and all the gubbins you need. So obviously I was going to buy it. I also through through the project and bought some scenery - as the challenge with painting these is to sell the size of the titans (180' tall!) and some magnets.

To start with, I built the titans and all the weapon variations. I added 3x1mm magnets meaning that the weapons can be swapped out depending on how I choose to run my titans for any given game. It sound fiddly but compared to my previous experience wiht magnets it was a piece of cake. The difficult thing was as always checking the polarity of the magnets before superglueing and working out which parts of the ball joint to sever with the dremel.


As you can see they slip together very easy. 


I also added some of the scenery to the bases to help with the scale. It turns out that Vallejo diorama paste is pretty much the right scale. 


Painting wise is used the same workflow as for the Knights of varying sizes by keeping the armour plates seperate for airbrushing while the skeleton is painted with metallics and drybrushing.

The plates were done with purple and then shaded to black with Black Contrast. The Contrast paints are very interesting used in an airbrush. Being quite translucent anyway they can be sprayed at quite high psi without thinning and used as a filter.


Then a big old gloss varnish to give some depth. 


The various limbs were then painted with blacks and purples and given a massive dose of painted gloss varnish as well. 


Trim was painted with a very bright silver. 


The contrasts came out again to get an engine glow in the exhausts - they are very good for wet blending and so with one three colours you can get a very nice effect. 


There's an awful lot of bits for final assembly!


My other purchase was some N-Gauge model railway trees. I just added some different shades of green to make them less vibrant. 


And then the final touch was some weathering pigmets to finish off the bases...


...and to tie the Titans into the bases.


And so the final effect is, I think, quite effective. 


I am very happy with how these look. Next up will be some teenty tiny Knights and then some traitor Titans. 

Oh, and while I was on, I decided to jazz up the arc templates for the game... 


Saturday, 20 April 2019

The FleshEngine


Through the smoke and the mud and the blood thundered the GodEngines of the Mechanicum and and we followed on behind. The heretics and infidels could not stand against us. Until the day we learned that not all the Noble Knights had remained loyal to the Goldem Throne. Until the day we met the Fleshengine. It stalked through the ranks of our men, and where its trunklike legs of iron struck the men were sucked into the armour, screaming as they were wrapped in tendrils of iron. Where the men were spat in, rugose demons emerged from the carapace of the unholy thing as tiny creatures capered over its armour. An entire battalion of Guardsmen fell to it, blown apart, ripped asunder or torn into unholy twisted versions of humanity. And then, then this broodmother, this fleshengine, turned on our Knights. I had never heard metal scream before that day. 

Now I can hear nothing else in the night. The screaming of Knights. 


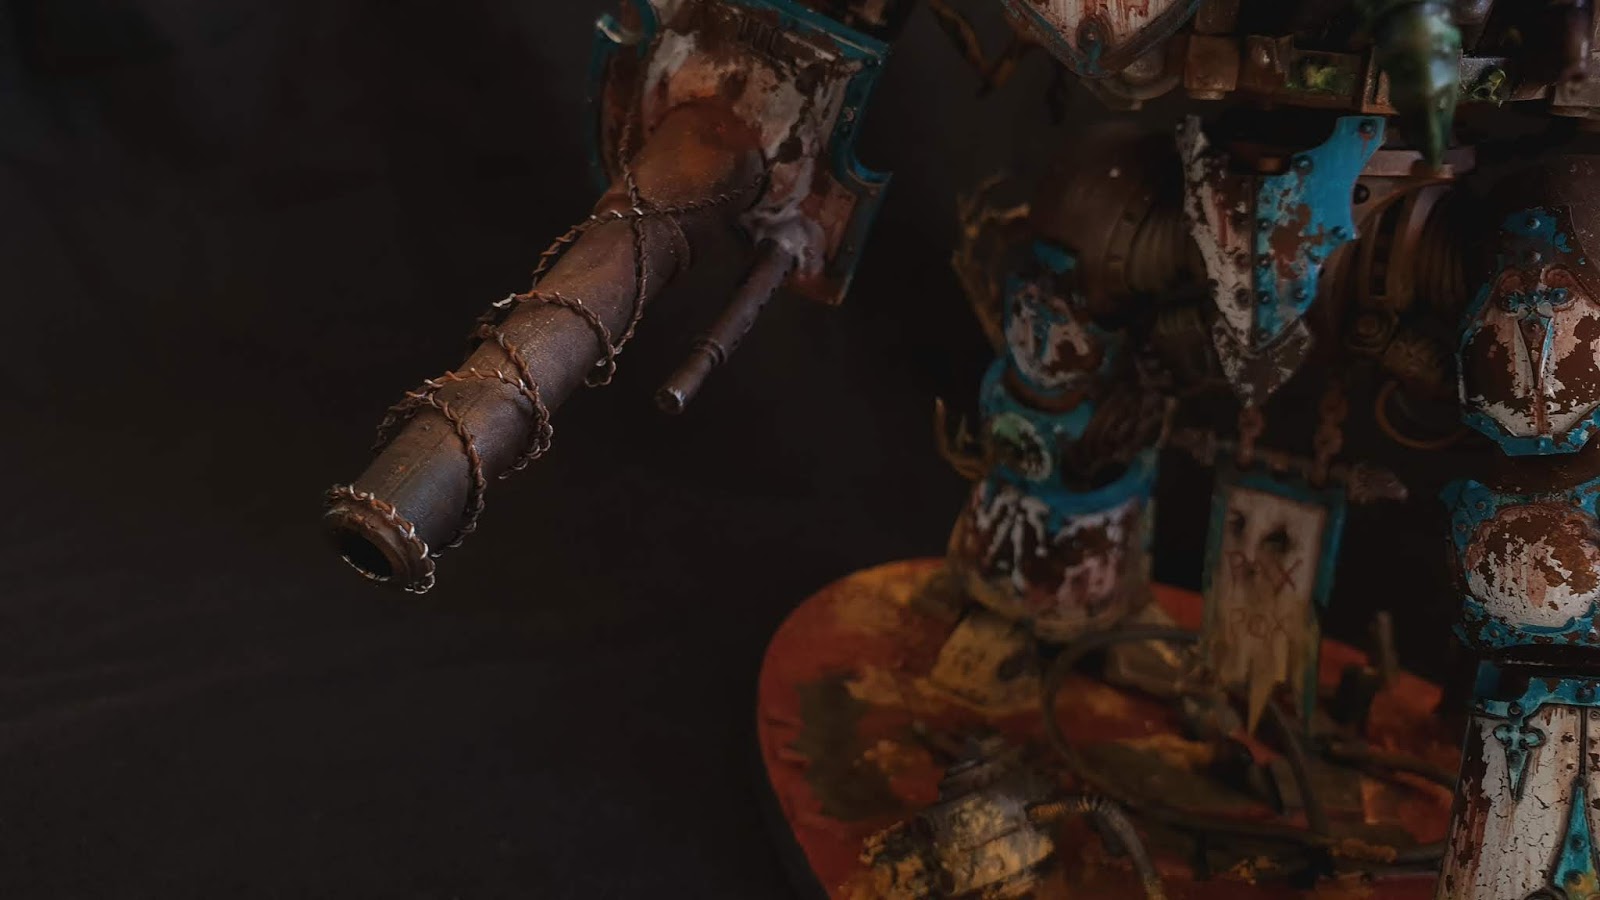
I had the chassis of a Knight left and I had always intended to create chaos version, but it wasn't until I looked closely at the Mephitic Blight Hauler kit that I figured out how to do the 'face'. Once I had that the rest sort of fell into place. 

This has been a massive project, so I apologise for the amount of photos and the length of the post, but this has been about three weeks on an off so I collected a lot of information. 

Step one was to cut out the face of the Blight Hauler. I also turned around the mouth parts and fastened them in to create a lower jaw. 

Using the dryad sprues I added some nurgly growth to the main body in various places.


This was probably the fiddliest bit of the conversion - I cut the joints of the fingers and remodelled the hand so it was pointing. 


Then I used a combination of foil and plastic putty to create an organic neck to fill where the new head would attach - you can barely see it on the finished model but leaving a gap would have felt very, very wrong. 


I wrapped barbed wire round lots of bits of the body - like this carapace cannon which I ended up leaving off. 


The chap being absorbed was a left over catachan who was sawn on a diagonal. Barbed wire was added for that Hellraiser touch and his shoulder joint was rebuilt so he was reaching out. 


Then painting the whole thing in my rust colours and airbrushing a coat of chipping medium over the top. I've also been playing with masking fluid on another project but for this chipping fluid was the definite tool for the job. 


A trick I learned last time was that if you apply the chipping medium very thick and don't let it dry before you add the top coat, the top coat splits and cracks. This is a very handy bit of information if you want to happen on purpose. 


Then I added the trim. If anyone is interested, the colour scheme is House Hawkwood from Fading Suns. 


Then, once it has dried, time to attack it with a toothbrush. 


Then it was a case of painting details...


And adding weathering using pigments and airbrush thinner.


I added some rigging and banners, just for fun and visual interest. 


I detailed the base with various bits of junk and the head I didn't use. 


This is going to be entered into a painting competition, so wish me luck!