Television is rather a frightening business. But I get all the relaxation I want from my collection of model soldiers.
Peter Cushing

Saturday 31 December 2022

Happy New Year


And Here We Go Again

 No, I'm not dead. 

Yes, I'm still painting miniatures, building models and playing games. 

Yes I have been truly awful at keeping this blog updated. 

However, new year is a time for New Resolutions so I'm going to try and keep this updated more often especially as I'm not using twitter any more. 

In the meantime, I'll try and post a few of the things I've been doing over the last year here 

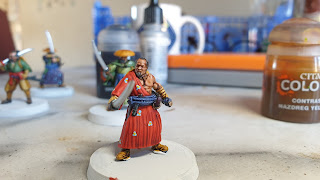
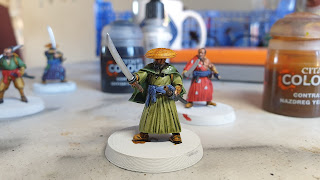
First up, some 3d printed Samurai for Test of Honour. This was more about having a go at patterns. 


Secondly, Gregor Eisenhorn. He's been sitting on the to do pile for three years so I figured he should get some love

I'll post some more tomorrow.

Tuesday 6 July 2021

Blendcast


 I am not dead! Just been very busy with work during the pandemic and doing little bits and pieces of hobby. 

My most recent experiment was trying out a wet palette for the first time. The results were quite pleasing.

As I get a bit more time I will try and post the other stuff I've been doing:

Victory at Sea

Blood Red Skies

A lighted USS Discovery 

Some model kits. 


Thursday 3 September 2020

The Wire

 The Book nook project is finished! In the last post I covered the basic planning and construction and here I'll cover the painting and electronics. 


So this is where  we left the construction; apart from the shell, everything was scratch built. 


The roof was next - a thick card shell with Weetabix packet tiles. 


The final shape is done. 


I added a pub sign made from a balsa blank and coffee stirrer. 


The whole thing was zenithal primed with spray cans and then given a base coat with the airbrush. Black for brick, blue black for tiles and off-white/beige mix for the wattle and daub. 


Then just a load of drybrushing. The wood was stained with Vallejo brown wash. 


I added some moss effect and tufts


Then a wash on the pavement to darken it in contrast with the walls. 


It was around this point that I started to think about the extras. I installed the switch and raided the bits box for my bad guys. 


I added some weathering powders just to dirty things up a bit. 


The windows were made of greaseproof paper (always worth remembering that in many medieval towns and villages people couldn't afford glass and so would use thin animal skins). I added some leading. 


Now we ran into the problem. I installed the LEDs and wired them up. However, I'd got my maths wrong and couldn't run all the lights in series. This meant I had to recreate the circuit as parallel - which meant that the wires would no longer fit into the channels I'd routed into the outer case. 


Tester of the new lighting circuit.


Here you can see thre mess of the wiring loom outside. Also, have green in the alleyway meant you couldn't see the depth so I changed the circuit again to swap a red light for the green. 


Now just the final touches; the skeltons were glued in


Then the Watch


Leaving us with the final look:


I then taped up the wires and sprayed the outside:


And here it is installed in one of the upstairs bookcases. 


I am overall, very happy with how this turned out. It's nice to have a way to display models. I suspect I will be making more of these! I hope the blog has been useful and I do recommend making one of these.