Television is rather a frightening business. But I get all the relaxation I want from my collection of model soldiers.
Peter Cushing
Showing posts with label paints. Show all posts

Tuesday, 13 December 2016

Oh The Weather Outside Is Frightful...

I've been mulling over what to do with the base for the Dragon for a little while now. I've finally got an idea in my head that will help make the green pop without going overblown; something quite wintery and cold.

This, however, means snow effects which I've never really had a go at before. As an added advantage I've been thinking about some winter Stalingrad stuff for a while so if I can figure out a way to make it look good, this could be another technique that will pay off for me.

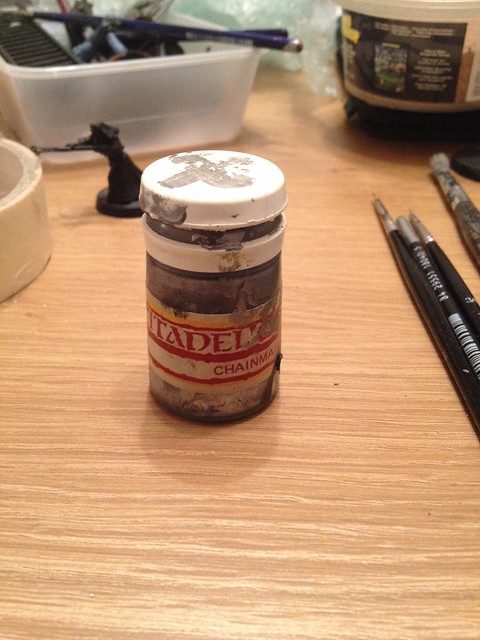
I had a browse around and found some nice tutorials, one including a mix which sounded like it would work. But then I saw GW had released this:


Now, I'm not going to lie; I'm lazy and my time is precious to me. This is why, even though I can more or less strip and rebuild a motorcycle engine, I will still take my bike to a garage. I'd rather spend the money and save the time than vice versa. So it is with this; in my younger days I would spend days making a piece of terrain - now I'll just buy it and leave more time for my kids or work or painting and gaming. So if GW had something which seemed to look very similar to the mix I'd found - apart from glitter which I'll come to in a moment - I'm quite happy to drop a fiver to try it out.

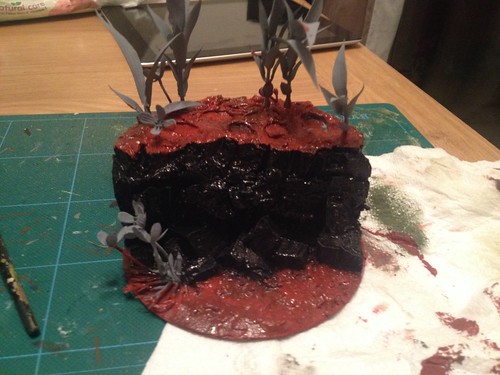
My test piece was the free model that came with White Dwarf a while ago that I tarted up for Dragon Rampant.

The Valhallan Blizzard (hereafter referred to as snow because I refuse to indulge GW's increasing eccentric naming conventions) is best applied I would say with a claw smoother. A stiff brush would also work, I think, but nothing soft or too hard.


As you can see, it has a pleasingly crystalline texture and a bit of white paint in the mix if I'm any judge. It gives a crisp white finish which lacks only the glitter of real snow. I applied a coat of gloss brish on varnish which seems to have helped with that but I'm tempted to possibly mix a bit of cheap glittery nail varnish in to the next lot I try.

Overall, a handy little addition to the box of tricks and - while not cheap at £4.50 a pop - is certainly good enough for a few bases. I reckon you could do a decent sized force - say 100 figures or so  - from one pot if you were after a thawed look, probably 50 if you were going for deep winter.

I shall have a go at the Dragon base this week so we can see if I'm right.


Friday, 26 December 2014

Adventurers - Midlam and Oathsworn

So my main present from She Who Must Be Obeyed was a complete set of Vallejo Model Colour paints which she found, unused, second hand.


Either that or she mugged someone for it.

I've been using mainly Vallejo Game Colour paints for years, but the Model range gives a much more natural palette which will - I think - work better with where my style is at now. After packing the Young Ones off to bed and watching Doctor Who (which was wonderful) I cracked open the new paints and painted the Dwarf character played by She Who Must Be Obeyed in my Mid-Life Crisis D&D game. I also finished off the wizard for another of our players.

Oathsworn dwarf - Thor Lowkey


Midlam Miniatures Wizard


I was able to practise a few techniques I needed to brush up on - excuse the pun. Both cloaks were done with glazes and the stunty chap's armour was gone with a mixture of inks and washes. Skin was layering as per usual. The mud was a mixture of drybrushing and my Tamiya mud stick. Having got shots of them painted, I'm going to try to the Vallejo brush on varnish so that if they get wrecked at least I've got good shots.

All that's left for them is basing; I'm undecided between a wilderness or dungeon base. Any bright ideas, please drop 'em in the comments.

My big takeaway from this is that I need practise with eyes for display models. I will therefore use the Ramblers of Rohan as test pieces for a) a more muted colour scheme and b) eyes.

Saturday, 1 November 2014

Paint Table Saturday - almost done

I actually managed to get some painting done on a Saturday for once, which means I get to use this fabulous graphic designed by someone much more talented than I.


So, we're at the point where the painting is more or less done apart from a couple of buckles, pupils and some gore (using the recipe provided by the always helpful Lord of Awdrey Towers). The next couple of sessions will be on terrain; this time, having painted the miniatures I'll be doing the setting to match their palette rather than the other way around as I did with the last lot. The idea here, though, will be to use some static grass to provide a quite bright background to give contrast to the dark figures. That's the plan, anyway.

So, here's the stout, God-fearing men:


 And here's the undead horde:
 And here's the wittyly anachronistic Ainsty Castings gravestones

 Last few compositional experiments before settling on the final layout:

 The most annoying thing is that on these photos I can again see mould lines that I missed. I must take more care on the prep next time. Thankfully the next project is a couple of single miniatures so I'll be forced to concentrate on the details rather than the overall effect.

Oh - and this post marks another Milestone: I've just passed 1000 page views. Thank you all for your continued support.

Tuesday, 7 October 2014

"The edge of a colossal jungle, so dark-green as to be almost black..."

Nothing like a bit of Joseph Conrad to brighten your day, I think.

So two nights of landscaping. A simple grey primer painted with acrylics 'borrowed' from school stock provided the base coat. Alas, whatever medium YPO are using in their acrylics drys in geological time so that was it for Monday night, leaving the state of affairs looking like this:

Untitled

Tonight, I attacked the mud with good old drybrushing followed by a wash to bind it together. The was is still slightly wet here, hence the shine:


I went with an almost Martian palette for a couple of reasons: first, I'm thinking of doing something Martian with my remaining line infantry and secondly, for this one, I wanted a ruddy colour to allow the red coats to act almost as highlights.

I was going to go with something similar for the rock - almost an Ayers Rock orangey look - but decided at the last moment that I wanted something darker to act as a background to Barney. It's not, geologically speaking, totally kosher but I've got a dinosaur facing off against Victorian infantry so I think the good ship HMS Verisimilitude sailed some time ago.


The last job for the evening was the basic colour on the vegetation. I used the same colours as on Barney, just with no wash. As these are Tamiya they give a very matt, flat finish which works well on the broad leaves once they've been given a touch of gloss varnish at the end. A different highlight to the dinosaur colours will give enough variation whilst still keeping a certain unified colour scheme.


So the final score for tonight looks like this:


and with a couple of the chaps to see how the whole thing is pulling together:

Untitled

So the last things to do are:

  • Finish detailing the plants, roots and flowers especially
  • Fasten in the troops and Barney and final blending of them into the base
  • Final landscaping - some scatter, static grass and sand to add the final level of detail.

It looks like I'm on track to get this one finished for the weekend at which point I can start planning the next one.

Sunday, 5 October 2014

Paint Table Sunday.

Paint table Sunday. It's a thing.

Just leave it, OK?

My wonderful other half kidnapped the children this morning so I got a chance to paint in daylight which is always handy when doing skin tones (I've got no odea where my daylight lamp went in the move).

I went with fairly dark skin, operating on the assumption that the chaps have been out in the noonday sun with the mad dogs for a while. As I mentioned in the comments, the faces are by far and away the best part of these sculpts, being even stronger on the plastics than on the metal officer.

So, basic shading (good old washes) and then highlights. A final shade where required. I got to practice some wet blending on the backof the uniform coats before I attempted the faces. Again, all done with a limited palette of a red, a white, a blue and a black  with Bone to mix in for highlights.

DSC_8621
Quite happy with the faces but the brushwork is still a little sloppy in places so I'll have to do some touch ups here and there. The blending on a couple of the highlights is still too harsh but that was the first couple of ones I'd tried it on.

Here they in a suitably cinematic ratio atop the hill:

DSC_8625
Annoyingly, there's a whopping great mold line I missed on the sergeant's arm that I only saw in hard sunlight.

And here that are a little closer so we can all the little imperfections.

DSC_8626
No time tonight - must finish resources for tomorrow! - and unlikely to do anything on Monday; but moving on to landscaping and terrain this week with the target of having the whole thing wrapped up by the weekend ready for the next one.

I'd just like to say thank you to everyone who's viewed and commented so far - it makes it a lot easier to keep up the momentum.

Thursday, 2 October 2014

Semper Fidelis

I've been painting and gaming for a very long time now. My bits and pieces of kit have followed me to university and through several house moves since. Brushes have come and gone, armies been bought, painted, sold or swapped and game loved then forgotten - but through it all, there has been one faithful servant:

Untitled
I bought that when I was 15. It's still liquid, still usable. Eeh, them were the days. Made to last, stuff were then. But it does make me wonder... is there anyone else out there still using the original Citadel paints after all these years?