Well, we're getting there bit by bit. Via the simple expedient of packing the kids off to nursery I've freed up some hobby time. Slow going on the painting due to being asked to have a game of WFB for the first time in two editions. So that required some hard graft in drawing up an army list.
It's a dirty job, but someone's got to do it.
In other news, I think I've cracked the zombie skin in a way which I'm more or less happy with. Vallejo dead flesh with a wash gives a decent base colour, although a little warm:
Highlighting with dead flesh/bleached bone cools it down again and restores the slightly sickly hue:
All the base colours are blocked in now, so it's just highlighting and detail work left to do and then we're on to landscaping. As per usual, highlighting black is a joy; I'd sadly forgotten the last lot of painting I'd done in which I'd simply shaded down from grey to get black and painted my Covenanted Men in base black, leaving me the fun (hah!)of mixing various greys and then blacks to shade again. Anyway, they are also done:
I don't think this one will be finished until the end of next week but I have hopes that it will look pretty close to what I had in mind.
Television is rather a frightening business. But I get all the relaxation I want from my collection of model soldiers.
Peter Cushing
Thursday 30 October 2014
Painting
Labels:
17th Century,
civil war,
detail,
ECW,
paint table Saturday,
painting,
WFB,
zomtober
Sunday 26 October 2014
Hang on...
...so I was catching up on my reading, and read this over at Cheaphammer:
Enquiring minds want to know. Tell us in the comments.
It's been a combination of having a lot on in terms of work (lots of marking and meetings)and then something I saw at the Lead Pile (making a gaming mat while his Sixth Formers got on with their projects - and oh, how I wish I was still working in a practical workshop and could do that). And it's moved me to ask - how many of us are teachers? Including the Talented Mr Awdry over at 28mm Victorian Warfare that makes 3 out of the 20 or so blogs I follow: statistical fluke or is wargaming something that especially appeals to the kind of people that go into teaching?
Enquiring minds want to know. Tell us in the comments.
It's ALIVE! - sort of Zomtober
It's true what they say; no idea you have after midnight is a good one. I performed surgery on the thumb with a pair of snips. Although this restored some movement it did give me a few more issues.
However, the most important point was that I was able to move my digits about enough to crack out the sculpting gear.
I've never been a particularly good sculptor - the Top Secret Filler Project will amply prove in a couple of weeks - but it's nice to see the techniques come dribbling back. So what did I need to do?
The cut and shut and method of the conversions on the walking dead was fine for tabletop use but for a diorama it's worth going the extra mile.
So this chap had some hair added to cover the complete lack of neck and to help blend the head into the existing shoulders. I also added a couple of tears and rents in the material of the coat - fairly simple musket damage.
This chap needed some raggedy bits of material and flesh to show where the leg had been ripped off (sorry about this poor photo)
As to leg thief this one wasn't a conversion so much as an issue with the original miniature; the Zombie sprues, although excellent, sometimes go from rotting corpse to skeletal too quickly depending on the choice of pieces and so it was with this chap. So a bit of torn material added around the shoulder joint helps sell the transition.
I actually forgot to take a picture of him, so you'll have to take my word for it.
Finally, this fellow needed some extra attention. As he'll be leading the charge and so will be the most immediately visible of the horde, he needed a little extra attention. The zombie arms did not really fit well with the ECW body, so the jacket was extended and torn to help blend the two pieces together; at the same time I added some tears in the trousers and jacket to make him look a bit more beaten up.
I also decided - based on rewatching Mark Gatiss' Horror Europa at the approach to Zombies in The Living Dead At The Manchester Morgue - I'd like him to have an obvious cause of death; so a quick edged trauma to the head was added.
These chaps, along with the gravestones and a couple of bits for the Top Secret Filler Project, were undercoated today; so my Half Term Plan is to crack on with the painting tomorrow.
Incidentally, you can see in the background there the ridiculous amount of greenstuff I bought off ebay by mistake. I thought I was ordering 6'' and instead got 36''. Still, I'm not going to run out any time soon, eh?
Labels:
17th Century,
blood,
civil war,
conversion,
ECW,
folk horror,
greenstuff,
modelling,
zomtober
Wednesday 22 October 2014
The Hands of Orlac
The thumb is about healed enough to do some carving today; painting and sculpting will take another few days, I think.
So, where did we get to? I've actually spent a very Cooper-ish evening watching Twin Peaks, drinking coffee and eating pie and then shining my shoes to a mirror finish. Inbetween episodes, I've managed to more or less finish the basic terrain and play around with some composition:
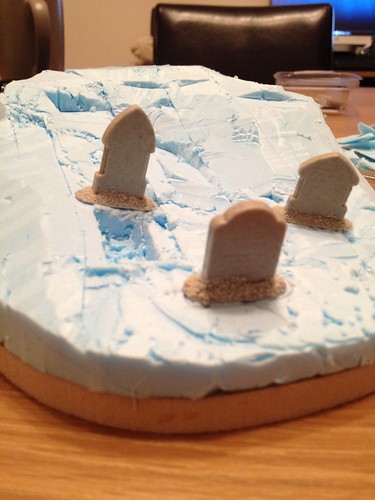
I quite like the progression of the tombstones to draw the eyes up. The gravestones are from the wonderful Ainsty Castings; full of detail and character. I'm quite looking forward to painting them up.
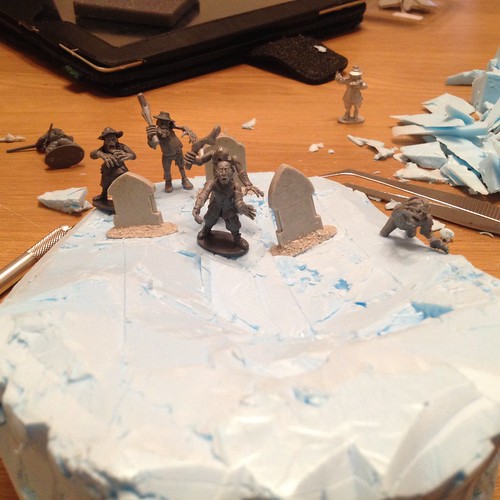
The view down the hill to see the shambling mass:
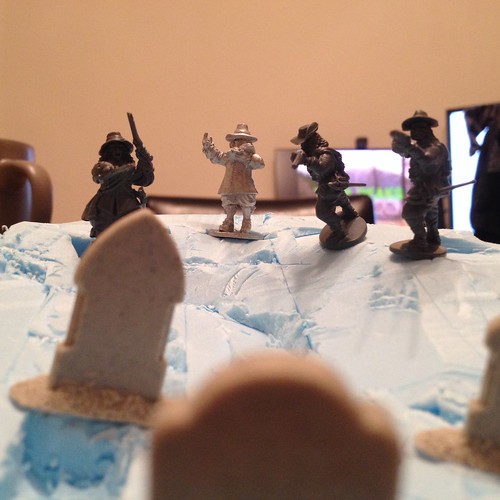
The view up the hill to see our noble heroes.
So assuming that I can bend my thumb properly the next step is to slap some filler on the ground and then sculpt the additional bits on the undead horde. Following this, painting ahoy. So expect to see some progress over half term.
*watching Twin Peaks has got me asking two questions.
First, does anyone make a 28mm Not Dale Cooper?
Second, how hard would it be to paint a floor like this?
So, where did we get to? I've actually spent a very Cooper-ish evening watching Twin Peaks, drinking coffee and eating pie and then shining my shoes to a mirror finish. Inbetween episodes, I've managed to more or less finish the basic terrain and play around with some composition:

I quite like the progression of the tombstones to draw the eyes up. The gravestones are from the wonderful Ainsty Castings; full of detail and character. I'm quite looking forward to painting them up.
The view down the hill to see the shambling mass:

The view up the hill to see our noble heroes.

So assuming that I can bend my thumb properly the next step is to slap some filler on the ground and then sculpt the additional bits on the undead horde. Following this, painting ahoy. So expect to see some progress over half term.
*watching Twin Peaks has got me asking two questions.
First, does anyone make a 28mm Not Dale Cooper?
Second, how hard would it be to paint a floor like this?
Labels:
17th Century,
civil war,
construction,
diorama,
ECW,
folk horror,
modelling,
terrain,
Twin Peaks
Monday 20 October 2014
Interregnum
After posting last night, I decided to do a little more landscaping work whilst watching Twin Peaks. Alas, I forgot the golden rule about always cutting away for yourself and, well....
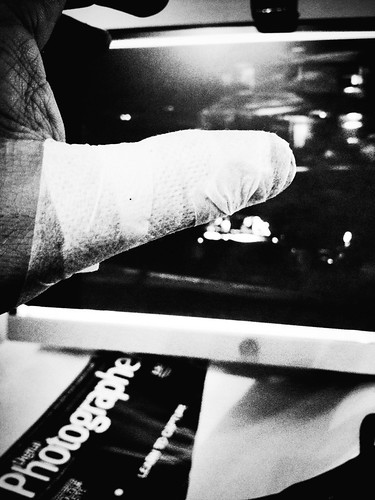
It took three dressings but the bleeding finally stopped. Anyway, it looks like the schedule will slip slightly as I can't bend the thumb.
Still, one must be prepared to suffer for one's art, eh?

It took three dressings but the bleeding finally stopped. Anyway, it looks like the schedule will slip slightly as I can't bend the thumb.
Still, one must be prepared to suffer for one's art, eh?
Labels:
Bandage,
blood,
construction
Sunday 19 October 2014
Slow progress is still progress...
Due to the fact that I can't find my greenstuff anywhere, work on finishing the undead menace has halted awaiting resupply. Today has therefore been a frustrating sequence of snatched bits between marking and parenting. The base is mounted and instructions added to ensure that my aged brain doesn't fail completely when the time comes to carve it:
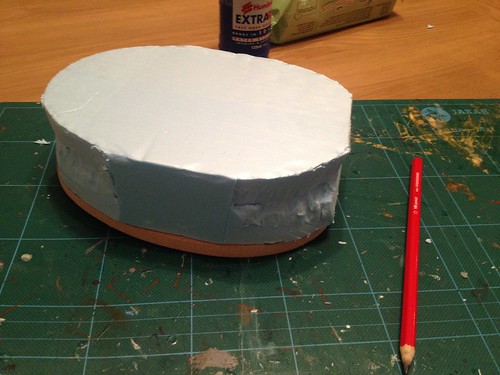
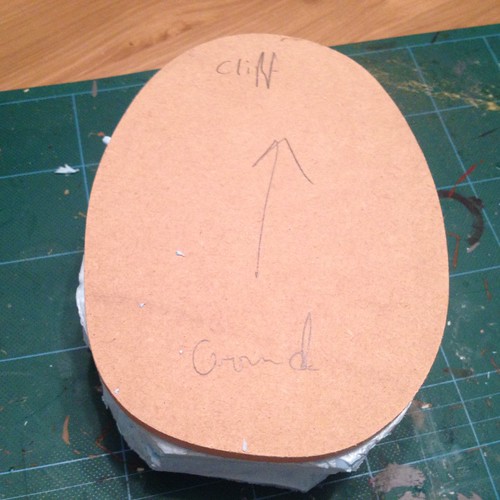
Work has also started on my Top Secret filler project:
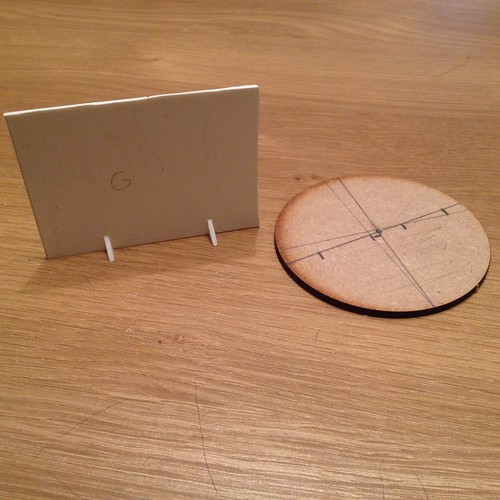
I'll not comment any more on that as I'll probably just unveil that one when it's done.
A trip to the car boot sale this morning netted me a little set of goodies. I nearly bought a load of 1/72nd saxons and normans in order to build a model of Senlac ridge to use in lessons, but they'd been painted (badly) and I didn't fancy going through all the hassle of stripping them. Instead I got these chaps for the princely sum of £8:
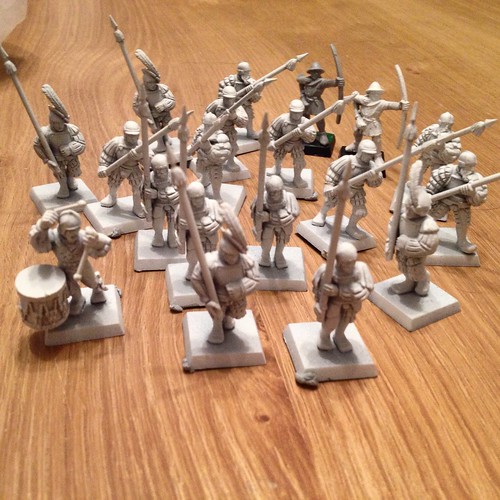
I'm torn between building a Games of Thrones vignette - these chaps strike me as a good base for some realistic looking Lannister footmen - or to try and build a warband for Saga or Lion Rampant. The idea for this is shamelessly ripped off from Mike C's Westeros Saga work which I thoroughly recommend you check out.
Has anyone picked up Lion Rampant yet? I do like the look of them but have yet to take the plunge. The added advantage is that it would give me an excuse to buy some Perry Foot Knights.


Work has also started on my Top Secret filler project:

I'll not comment any more on that as I'll probably just unveil that one when it's done.
A trip to the car boot sale this morning netted me a little set of goodies. I nearly bought a load of 1/72nd saxons and normans in order to build a model of Senlac ridge to use in lessons, but they'd been painted (badly) and I didn't fancy going through all the hassle of stripping them. Instead I got these chaps for the princely sum of £8:

I'm torn between building a Games of Thrones vignette - these chaps strike me as a good base for some realistic looking Lannister footmen - or to try and build a warband for Saga or Lion Rampant. The idea for this is shamelessly ripped off from Mike C's Westeros Saga work which I thoroughly recommend you check out.
Has anyone picked up Lion Rampant yet? I do like the look of them but have yet to take the plunge. The added advantage is that it would give me an excuse to buy some Perry Foot Knights.
Labels:
construction,
diorama,
Games Workshop,
Gladiator,
Roman,
terrain
Friday 17 October 2014
God's Fire, England's Fury and West's Zombies
A bad week of parents' evenings and marking has severely cut into my plans for the week. As it happens, I only managed to get the base cut from some offcut MDF at work:
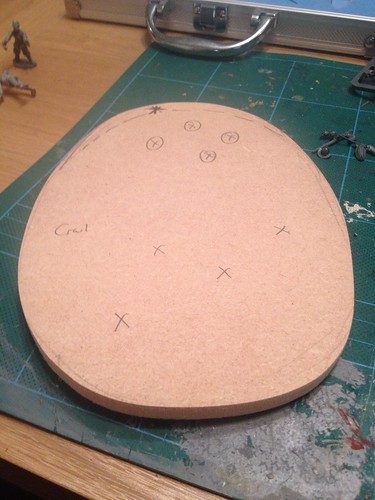
before this evening sitting down to some cutting and sticking. Once I'd got the base in front of me, it rapidly became apparent that my original sketch included too many of the vitally challenged.
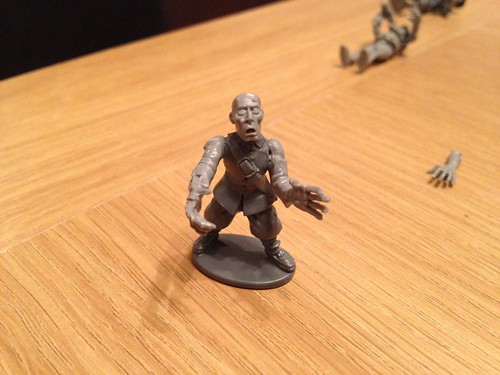
A quick rethink led me to these fine chaps. They are constructed from the old faithful Games Workshop Zombie sprue from the turn of the century. Lacking the more outre design elements which came to plague later GW sculpts, these are incredible fodder for conversions, offering arms, heads, bodies and legs which can be mixed and matched to your heart's content.
In order to help anchor the period I carved up a couple of the Warlord Parliamentarians so that some of the foul undead horde would be dressed in a slightly more formal fashion than the run of the mill peasants that the rest of them represented. The Warlord sprues also furnished some headgear which helps give the shamblers some character.
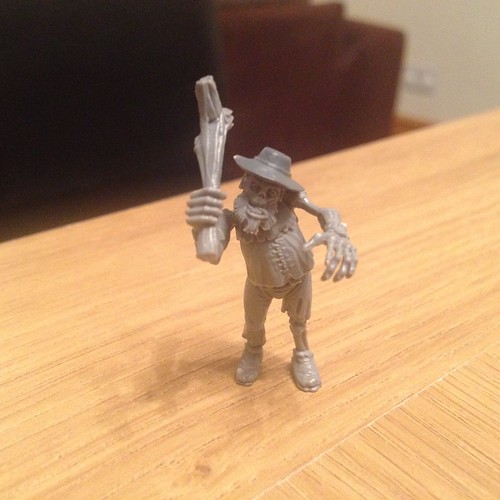
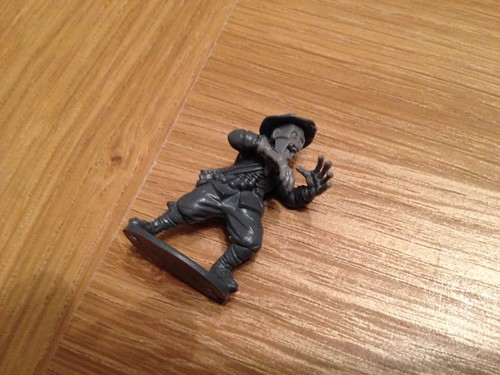
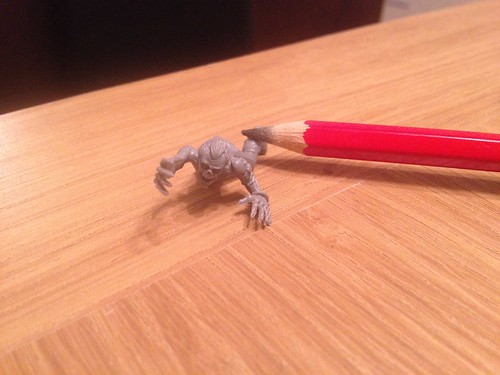
Why is this chap crawling?
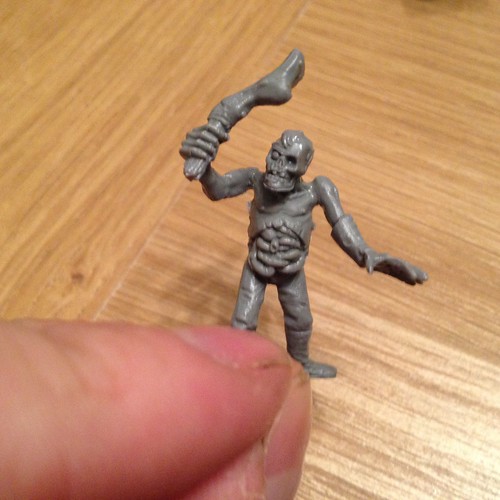
It might be something to do with this chap's choice of blunt instrument...
So tomorrow will probably be terrain building and greenstuffing on the brain hungry mass with painting on the schedule for weeknights next week.

before this evening sitting down to some cutting and sticking. Once I'd got the base in front of me, it rapidly became apparent that my original sketch included too many of the vitally challenged.
A quick rethink led me to these fine chaps. They are constructed from the old faithful Games Workshop Zombie sprue from the turn of the century. Lacking the more outre design elements which came to plague later GW sculpts, these are incredible fodder for conversions, offering arms, heads, bodies and legs which can be mixed and matched to your heart's content.
In order to help anchor the period I carved up a couple of the Warlord Parliamentarians so that some of the foul undead horde would be dressed in a slightly more formal fashion than the run of the mill peasants that the rest of them represented. The Warlord sprues also furnished some headgear which helps give the shamblers some character.


Why is this chap crawling?

It might be something to do with this chap's choice of blunt instrument...

So tomorrow will probably be terrain building and greenstuffing on the brain hungry mass with painting on the schedule for weeknights next week.
Labels:
17th Century,
civil war,
conversion,
ECW,
folk horror,
Games Workshop,
zomtober
Tuesday 14 October 2014
A milestone
Crikey, chaps. 500 page views in a little over a week.
Thanks for all your support; it's very reassuring to know I have people to help chivvy me on.
Thanks for all your support; it's very reassuring to know I have people to help chivvy me on.
Thou Shalt Not Suffer...
And so we begin with the second one.
As any general will tell you, detailed planning is the key to a successful operation.
So here we have my detailed plan.
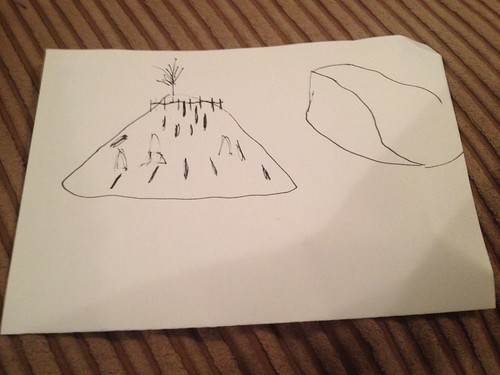
Stunning, I'm sure you'll agree.
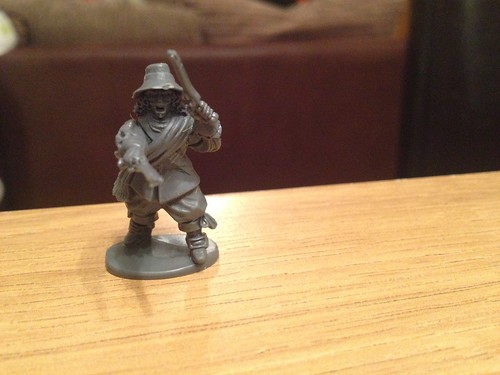
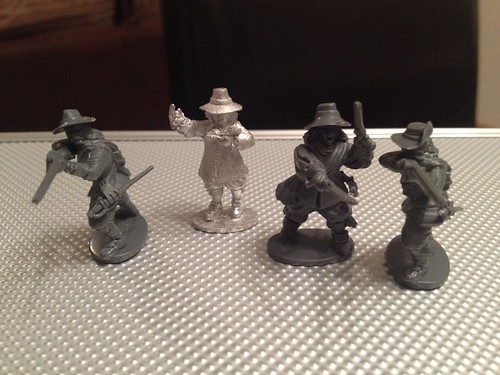
Our stars for this project are the Warlord Games Parliamentary Infantry; phenomenal value as this box cost me only £12 at a show. That's £12 for 40 miniatures. I'm just going to say that again - £12 for 40 figures. Now I know the usual RRP is £22 - but that's still around 50p per chap. As I say - incredible value. Three of them will be forming the main body of our gallant heroes whilst the rest of them... ah, well, that would be telling.
The sculpts on these seem to be better than the British Line Infantry used in the last project; there are fewer soft areas and the details are generally crisper. The faces, as with the other Warlord plastics I used, are a particular strength; full of character and emotion. I just hope the painting does them justice.
Poses are a little limited as the bandoliers and apostles limit which arms and muskets and can arranged on which bodies. This could well lead to a lot of repetition if you were building a proper wargaming force; for limited use in a vignette, there's no concerns really.
The only lead addition to this is the Rabble Rouser I bought the pack for; indeed, the whole concept of the piece hung on finding the right figure in the right pose, so I was happy to find this chap. Here he is with his comrades.
So tomorrow will be the construction of the Opposition; this will require a trip into the depths of the garage as I pretend to be Indiana Jones in Raiders of the Lost Lead Pile. After that will be the start of construction on the scenic elements. This all works out quite nicely as I'm teaching the Wars of the Three Kingdoms at the moment and so can pass this all off as research if I talk fast enough.
In other news, Lion Rampant has caught my eye with the thought of cobbling together some Low Fantasy, semi-historical stuff but that's on the back-burner.
I must resist the Siren call of Shinybloodyitis.
As any general will tell you, detailed planning is the key to a successful operation.
So here we have my detailed plan.

Stunning, I'm sure you'll agree.
Our stars for this project are the Warlord Games Parliamentary Infantry; phenomenal value as this box cost me only £12 at a show. That's £12 for 40 miniatures. I'm just going to say that again - £12 for 40 figures. Now I know the usual RRP is £22 - but that's still around 50p per chap. As I say - incredible value. Three of them will be forming the main body of our gallant heroes whilst the rest of them... ah, well, that would be telling.

The sculpts on these seem to be better than the British Line Infantry used in the last project; there are fewer soft areas and the details are generally crisper. The faces, as with the other Warlord plastics I used, are a particular strength; full of character and emotion. I just hope the painting does them justice.
Poses are a little limited as the bandoliers and apostles limit which arms and muskets and can arranged on which bodies. This could well lead to a lot of repetition if you were building a proper wargaming force; for limited use in a vignette, there's no concerns really.
The only lead addition to this is the Rabble Rouser I bought the pack for; indeed, the whole concept of the piece hung on finding the right figure in the right pose, so I was happy to find this chap. Here he is with his comrades.

So tomorrow will be the construction of the Opposition; this will require a trip into the depths of the garage as I pretend to be Indiana Jones in Raiders of the Lost Lead Pile. After that will be the start of construction on the scenic elements. This all works out quite nicely as I'm teaching the Wars of the Three Kingdoms at the moment and so can pass this all off as research if I talk fast enough.
In other news, Lion Rampant has caught my eye with the thought of cobbling together some Low Fantasy, semi-historical stuff but that's on the back-burner.
I must resist the Siren call of Shinybloodyitis.
Labels:
17th Century,
construction,
ECW,
folk horror,
Warlord Games,
zomtober
Saturday 11 October 2014
Shield Question
Just looking at the Romans taking shape over at Legatus' blog and his musing about shield transfers. Back in my days of scale modelling quite a few people had some success printing their own decals. Has anyone tried that for shields?
One of the projects coming up will require the painting of a large number of shields and given what happened to the White Hands on my Uruk Hai last time, any shortcuts are probably to be seized with both hands.
One of the projects coming up will require the painting of a large number of shields and given what happened to the White Hands on my Uruk Hai last time, any shortcuts are probably to be seized with both hands.
If you can keep your head when all about you are losing theirs and-- WHAT THE HELL IS THAT?
It was in the long hot summer of 1898 that caravans started going missing to the south of Wadi Phukwa'zaht. Harassed by the Colonial Office and - perhaps more importantly - seeing the gifts and gratuities he had become accustomed to receiving from various businesses vanish like a mirage, the Governor General suggested an investigation was in order.
Thus it was that a small section under the command of one Lt. Keene was dispatched to find out who or what was responsible for the disappearances. He and his faithful Sergeant Cordwangle were quite unprepared for what they found...
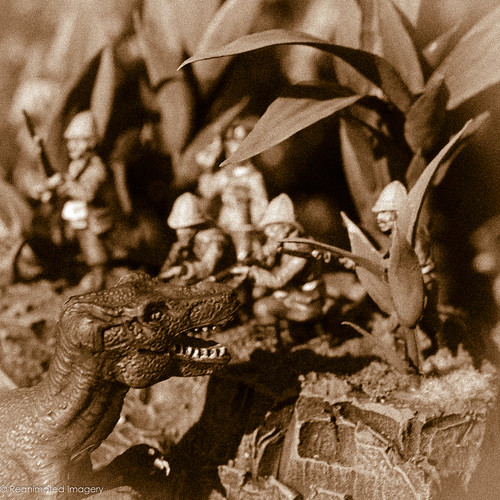
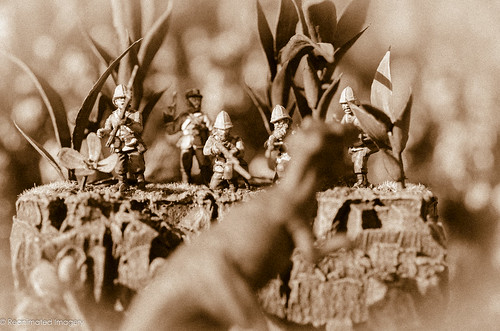
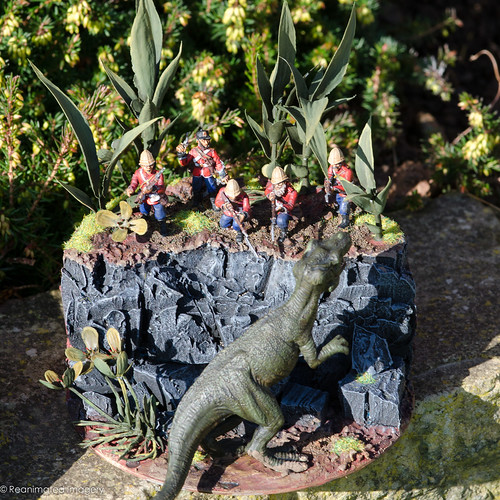
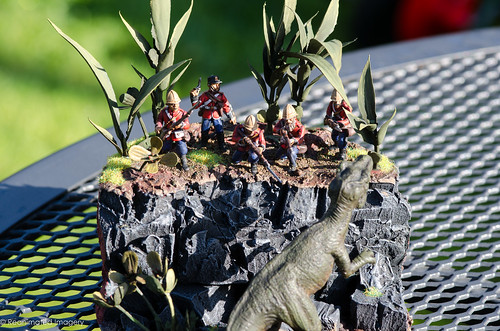
Well, here it is. I'm eternally grateful to everyone who's supported me in my efforts to get back in to the hobby. Your compliments and cheerleading have been vital to the success of this little project.
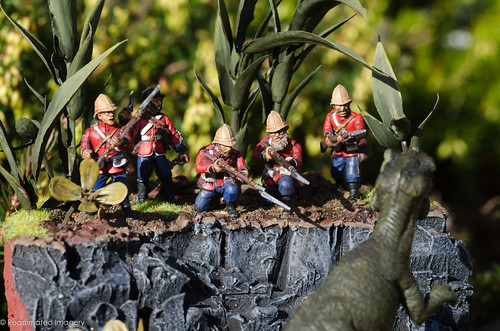
I am quite happy with how it's turned out; perhaps more importantly, aside from the few places where the brushwork isn't up to much, I'm glad that I have started to built up my confidence and remember some techniques after the long gap.
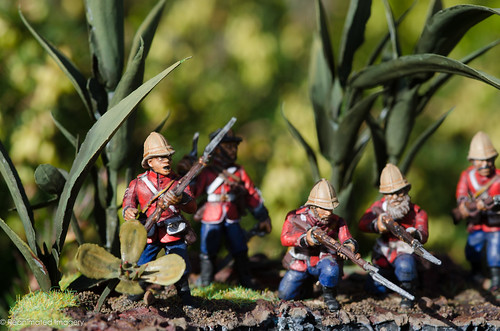
Perhaps more importantly, it looks pretty much like what I had in my head when I had the idea for it in the summer looking at Mr Awdry's wonderful Whitechapel CD-based vignette at 28mm Victorian Warfare.
The last few in progress shots are:
The bases were blended in with some simple basing sand which then had a wash applied:
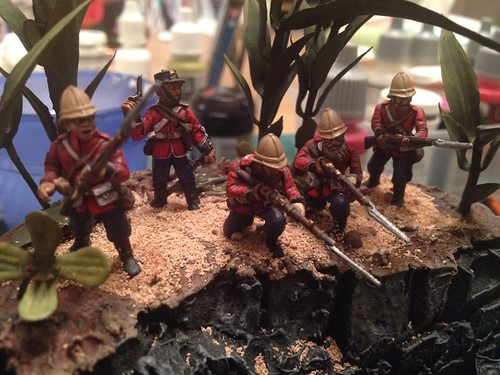
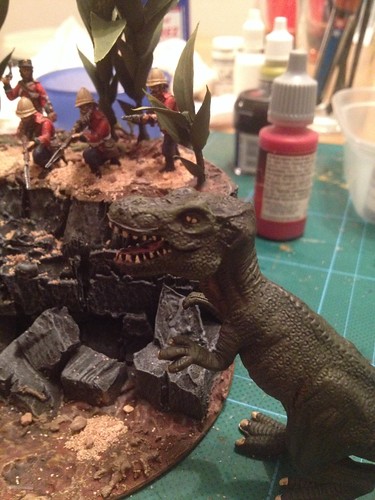
And the last details were added to Barney
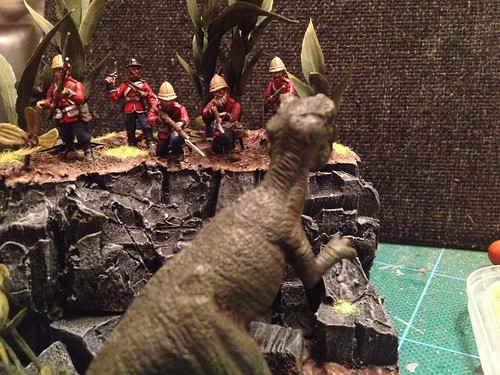
And then finally some static grass was added to give some variation to the ground cover. I would have liked to add some moss to the rocks but I can't find my flock anywhere.
The total cost for the project was a quarter of a box of British Line Infantry, so call that a fiver; an old PS2 game, 50p for Barney and £2 for the aquarium plants. Everything else was offcuts and leftovers.
See you all next week for the next project which is a little bit Hammer and a little bit folk horror...
Thus it was that a small section under the command of one Lt. Keene was dispatched to find out who or what was responsible for the disappearances. He and his faithful Sergeant Cordwangle were quite unprepared for what they found...


Well, here it is. I'm eternally grateful to everyone who's supported me in my efforts to get back in to the hobby. Your compliments and cheerleading have been vital to the success of this little project.

I am quite happy with how it's turned out; perhaps more importantly, aside from the few places where the brushwork isn't up to much, I'm glad that I have started to built up my confidence and remember some techniques after the long gap.

Perhaps more importantly, it looks pretty much like what I had in my head when I had the idea for it in the summer looking at Mr Awdry's wonderful Whitechapel CD-based vignette at 28mm Victorian Warfare.
The last few in progress shots are:
The bases were blended in with some simple basing sand which then had a wash applied:


And the last details were added to Barney

And then finally some static grass was added to give some variation to the ground cover. I would have liked to add some moss to the rocks but I can't find my flock anywhere.

The total cost for the project was a quarter of a box of British Line Infantry, so call that a fiver; an old PS2 game, 50p for Barney and £2 for the aquarium plants. Everything else was offcuts and leftovers.
See you all next week for the next project which is a little bit Hammer and a little bit folk horror...
Friday 10 October 2014
Shinybloodyitis 1 - Me 0
I am very impressed with Warlord Games' service. The single miniature I needed to complete the complement for the next project arrived almost the day after I ordered it.
Errrr... along with some more miniatures.
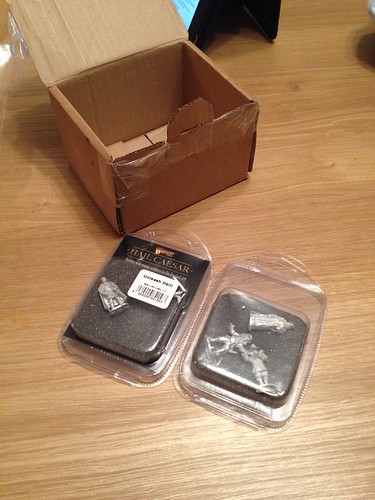
Now, to be fair, I didn't spend much. But the entire point of this was that I wasn't going to spend anything more than the bare minimum to avoid the wrath of She Who Must Be Obeyed. So I guess I have to find a use for the leftovers.
For the tally, then, I have two seventeenth century Rabble Rousers to use up and a suspiciously familiar roman general...
I have an idea for the General but I'm damned if I can think of a use for the two spare seventeenth century chaps. I'll stick up a picture of them when I've got them unpacked so anyone who's got any bright ideas can chip in.
Errrr... along with some more miniatures.

Now, to be fair, I didn't spend much. But the entire point of this was that I wasn't going to spend anything more than the bare minimum to avoid the wrath of She Who Must Be Obeyed. So I guess I have to find a use for the leftovers.
For the tally, then, I have two seventeenth century Rabble Rousers to use up and a suspiciously familiar roman general...
I have an idea for the General but I'm damned if I can think of a use for the two spare seventeenth century chaps. I'll stick up a picture of them when I've got them unpacked so anyone who's got any bright ideas can chip in.
Labels:
17th Century,
civil war,
Gladiator,
Roman,
Shopping
Thursday 9 October 2014
An Intermission
Progress is ongoing. I'm on track to finish tomorrow night or possibly Saturday at the outside. The brave chaps of the Prince of Wales' Own Volunteers have been stuck on and modelled in. Just waiting for the glue to dry for final weathering and blended and then we pop Barney on.
I didn't want to post any pictures tonight as I'm almost ready for the grand unveiling but I likewise didn't want to leave the blog entry un-illustrated. I've therefore put my other skills as a photographer to use to produce this so you'd all have something to look at:
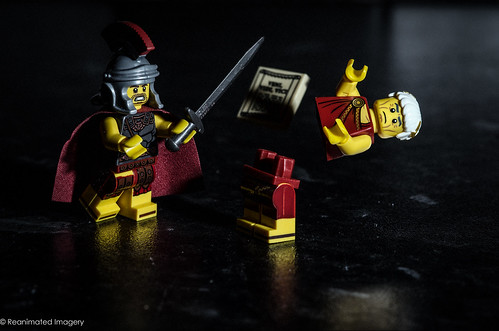
Thinking ahead to the project after next, you see.
If anyone of you are pulpy Lovecraft lovers, incidentally, you might find some of the photographs I've taken interesting. You can see them here or more general photography can be found here or even here if you're not allergic to Tumblr and want to see my more peculiar creations. I will, needless to say, be doing some decent photographs of the model when it's done.
Close to the finish line!
I didn't want to post any pictures tonight as I'm almost ready for the grand unveiling but I likewise didn't want to leave the blog entry un-illustrated. I've therefore put my other skills as a photographer to use to produce this so you'd all have something to look at:

Thinking ahead to the project after next, you see.
If anyone of you are pulpy Lovecraft lovers, incidentally, you might find some of the photographs I've taken interesting. You can see them here or more general photography can be found here or even here if you're not allergic to Tumblr and want to see my more peculiar creations. I will, needless to say, be doing some decent photographs of the model when it's done.
Close to the finish line!
Labels:
lego,
lovecraft,
photography,
pulp,
Roman
Wednesday 8 October 2014
Oops.
I just popped on to Warlord Games to buy a miniature for the next little project. Given that the postage is £4 for any order under £10 I may have ended up spending a little more than I intended in order to feel like I got my money's worth.
On the plus side, it does give me a focus for the next thing after the next thing while I plan the next thing after that. Without giving anything away, I'll simply say that what we do in life echoes in eternity.
On the plus side, it does give me a focus for the next thing after the next thing while I plan the next thing after that. Without giving anything away, I'll simply say that what we do in life echoes in eternity.
Tuesday 7 October 2014
"The edge of a colossal jungle, so dark-green as to be almost black..."
Nothing like a bit of Joseph Conrad to brighten your day, I think.
So two nights of landscaping. A simple grey primer painted with acrylics 'borrowed' from school stock provided the base coat. Alas, whatever medium YPO are using in their acrylics drys in geological time so that was it for Monday night, leaving the state of affairs looking like this:
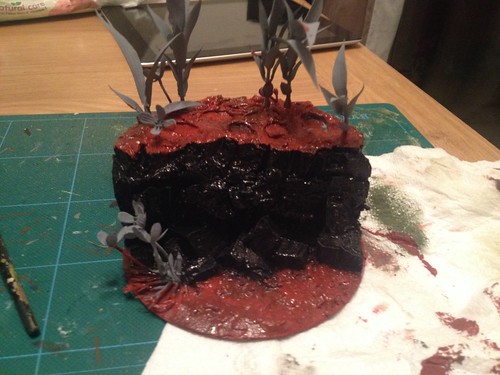
Tonight, I attacked the mud with good old drybrushing followed by a wash to bind it together. The was is still slightly wet here, hence the shine:
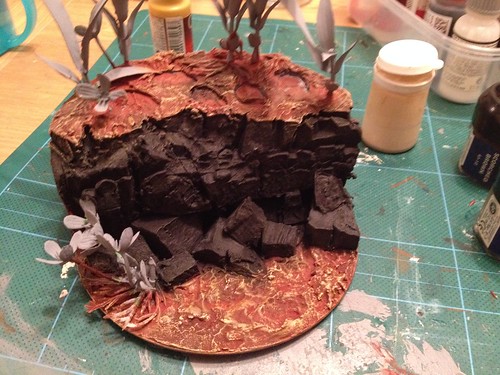
I went with an almost Martian palette for a couple of reasons: first, I'm thinking of doing something Martian with my remaining line infantry and secondly, for this one, I wanted a ruddy colour to allow the red coats to act almost as highlights.
I was going to go with something similar for the rock - almost an Ayers Rock orangey look - but decided at the last moment that I wanted something darker to act as a background to Barney. It's not, geologically speaking, totally kosher but I've got a dinosaur facing off against Victorian infantry so I think the good ship HMS Verisimilitude sailed some time ago.
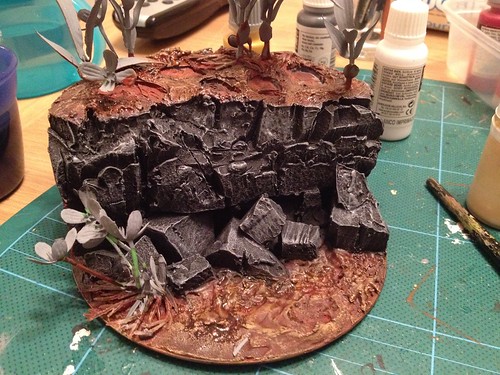
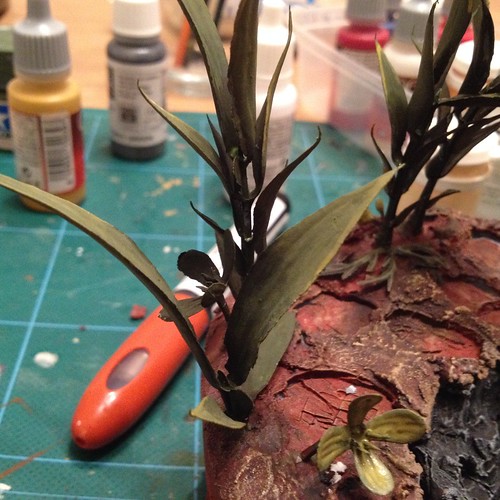
The last job for the evening was the basic colour on the vegetation. I used the same colours as on Barney, just with no wash. As these are Tamiya they give a very matt, flat finish which works well on the broad leaves once they've been given a touch of gloss varnish at the end. A different highlight to the dinosaur colours will give enough variation whilst still keeping a certain unified colour scheme.
So the final score for tonight looks like this:

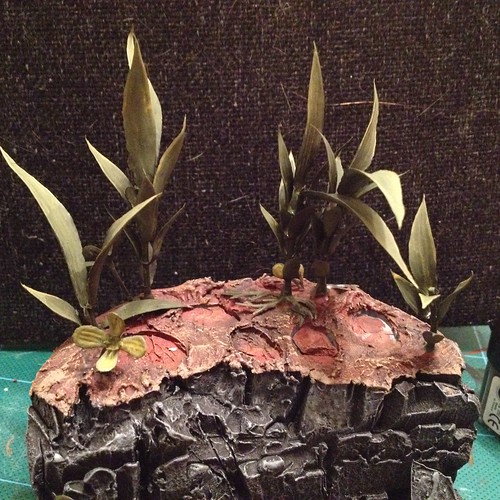
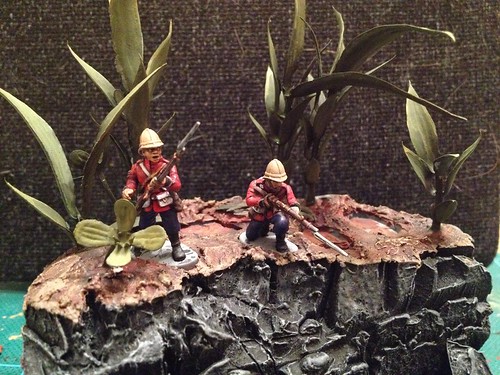
and with a couple of the chaps to see how the whole thing is pulling together:
So the last things to do are:
It looks like I'm on track to get this one finished for the weekend at which point I can start planning the next one.
So two nights of landscaping. A simple grey primer painted with acrylics 'borrowed' from school stock provided the base coat. Alas, whatever medium YPO are using in their acrylics drys in geological time so that was it for Monday night, leaving the state of affairs looking like this:

Tonight, I attacked the mud with good old drybrushing followed by a wash to bind it together. The was is still slightly wet here, hence the shine:

I went with an almost Martian palette for a couple of reasons: first, I'm thinking of doing something Martian with my remaining line infantry and secondly, for this one, I wanted a ruddy colour to allow the red coats to act almost as highlights.
I was going to go with something similar for the rock - almost an Ayers Rock orangey look - but decided at the last moment that I wanted something darker to act as a background to Barney. It's not, geologically speaking, totally kosher but I've got a dinosaur facing off against Victorian infantry so I think the good ship HMS Verisimilitude sailed some time ago.

The last job for the evening was the basic colour on the vegetation. I used the same colours as on Barney, just with no wash. As these are Tamiya they give a very matt, flat finish which works well on the broad leaves once they've been given a touch of gloss varnish at the end. A different highlight to the dinosaur colours will give enough variation whilst still keeping a certain unified colour scheme.

So the final score for tonight looks like this:


and with a couple of the chaps to see how the whole thing is pulling together:

So the last things to do are:
- Finish detailing the plants, roots and flowers especially
- Fasten in the troops and Barney and final blending of them into the base
- Final landscaping - some scatter, static grass and sand to add the final level of detail.
It looks like I'm on track to get this one finished for the weekend at which point I can start planning the next one.
Sunday 5 October 2014
Plugs
I'd just like to thank fellow History teacher and all round good egg Michael Awdrey for his plug of this blog - check out his wonderful work here.
I'd also like to echo his pointer towards Mike's Random Wargames Meanderings which is currently infecting me with a bad case of shinybloodyitis in terms of a SAGA warband.
While we're on the subject, I'd highly recommend Random Encounters for the most creative take on historical zombies for Zomtober I've ever seen.
My next project is, indeed, going to be a little Hammer Horror but is unlikely to be finished for Zomtober. Perhaps I can claim it as Novzomber or something.
Paint Table Sunday.
Paint table Sunday. It's a thing.
Just leave it, OK?
My wonderful other half kidnapped the children this morning so I got a chance to paint in daylight which is always handy when doing skin tones (I've got no odea where my daylight lamp went in the move).
I went with fairly dark skin, operating on the assumption that the chaps have been out in the noonday sun with the mad dogs for a while. As I mentioned in the comments, the faces are by far and away the best part of these sculpts, being even stronger on the plastics than on the metal officer.
So, basic shading (good old washes) and then highlights. A final shade where required. I got to practice some wet blending on the backof the uniform coats before I attempted the faces. Again, all done with a limited palette of a red, a white, a blue and a black with Bone to mix in for highlights.
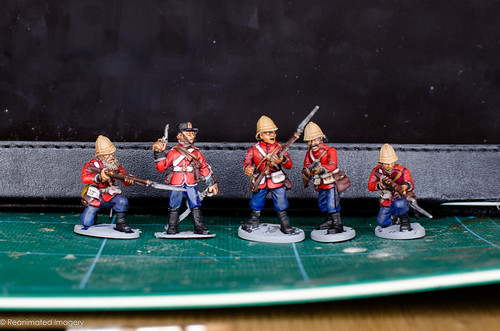
Quite happy with the faces but the brushwork is still a little sloppy in places so I'll have to do some touch ups here and there. The blending on a couple of the highlights is still too harsh but that was the first couple of ones I'd tried it on.
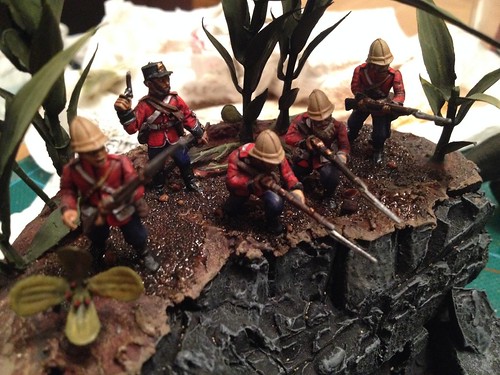
Here they in a suitably cinematic ratio atop the hill:
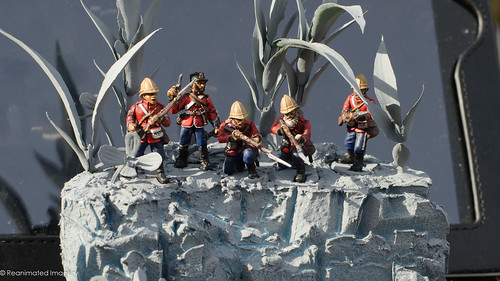
Annoyingly, there's a whopping great mold line I missed on the sergeant's arm that I only saw in hard sunlight.
And here that are a little closer so we can all the little imperfections.
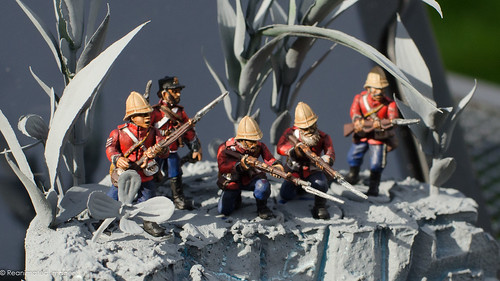
No time tonight - must finish resources for tomorrow! - and unlikely to do anything on Monday; but moving on to landscaping and terrain this week with the target of having the whole thing wrapped up by the weekend ready for the next one.
I'd just like to say thank you to everyone who's viewed and commented so far - it makes it a lot easier to keep up the momentum.
Just leave it, OK?
My wonderful other half kidnapped the children this morning so I got a chance to paint in daylight which is always handy when doing skin tones (I've got no odea where my daylight lamp went in the move).
I went with fairly dark skin, operating on the assumption that the chaps have been out in the noonday sun with the mad dogs for a while. As I mentioned in the comments, the faces are by far and away the best part of these sculpts, being even stronger on the plastics than on the metal officer.
So, basic shading (good old washes) and then highlights. A final shade where required. I got to practice some wet blending on the backof the uniform coats before I attempted the faces. Again, all done with a limited palette of a red, a white, a blue and a black with Bone to mix in for highlights.

Quite happy with the faces but the brushwork is still a little sloppy in places so I'll have to do some touch ups here and there. The blending on a couple of the highlights is still too harsh but that was the first couple of ones I'd tried it on.
Here they in a suitably cinematic ratio atop the hill:

Annoyingly, there's a whopping great mold line I missed on the sergeant's arm that I only saw in hard sunlight.
And here that are a little closer so we can all the little imperfections.

No time tonight - must finish resources for tomorrow! - and unlikely to do anything on Monday; but moving on to landscaping and terrain this week with the target of having the whole thing wrapped up by the weekend ready for the next one.
I'd just like to say thank you to everyone who's viewed and commented so far - it makes it a lot easier to keep up the momentum.
Saturday 4 October 2014
Thin Red Lines
Crikey, that was troublesome. A decent session tonight, broken up for a rather splendid episode of Doctor Who, allowed to start picking up where my long break has left me.
As I said, brush control is a problem. It was getting better by the end of the evening but there were some awful cases of slips and blurring lines at the beginning. Anyway, by the end, I'd started to get into the swing of balancing paint consistency, brush loading and control. I think that tomorrow I'll be up to the fine detail work.
Here you can see the chaps with main colour blocked in; the second coat of lighter red gives some depth to the coats and grey undercoat pays off with the thinned blue coat over the trousers. Basic detail work on the webbing and packs is also roughed in:
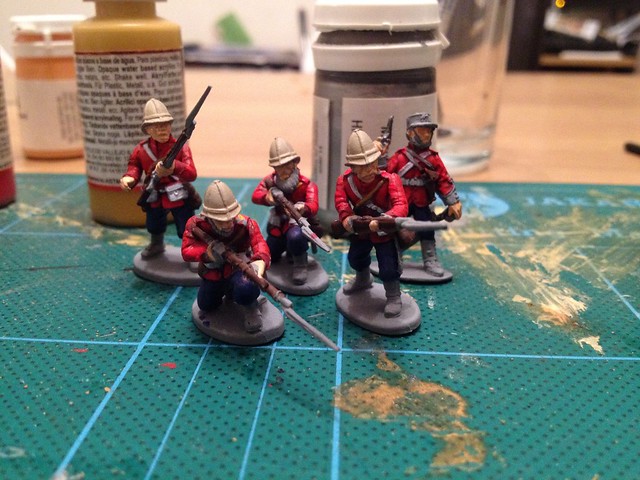 And here's where we leave them this evening with all base colours in and some gross detailing on the faces, webbing, packs and what have you. I've decided on black cuffs and facings for the full Zulu feel.
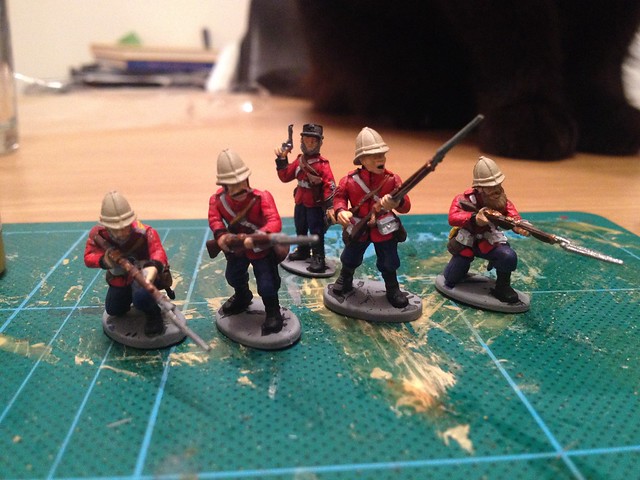 Overall, I'm quite happy with the sculpts. As I mentioned to the fine Mr Awdrey in the comments to a previous posts, the poses are a little limited but easy enough to tweak for vignette purposes. There's a few soft details around where the hands meet the rifles and 'round the back of the packs; all fixable in the painting, I suppose, but I'd want something a little sharper if I were building full on character models. But for rank and file? You can't argue with the price and the quality. Mark me down as a fan of Warlord, and I look forward to playing with the ECW chaps for the next vignette.
So a slight break and I'll be painting some more Monday or Tuesday. Shading and detailed should see the brave chaps done.
 And here's where we leave them this evening with all base colours in and some gross detailing on the faces, webbing, packs and what have you. I've decided on black cuffs and facings for the full Zulu feel.
 Overall, I'm quite happy with the sculpts. As I mentioned to the fine Mr Awdrey in the comments to a previous posts, the poses are a little limited but easy enough to tweak for vignette purposes. There's a few soft details around where the hands meet the rifles and 'round the back of the packs; all fixable in the painting, I suppose, but I'd want something a little sharper if I were building full on character models. But for rank and file? You can't argue with the price and the quality. Mark me down as a fan of Warlord, and I look forward to playing with the ECW chaps for the next vignette.
So a slight break and I'll be painting some more Monday or Tuesday. Shading and detailed should see the brave chaps done.
Friday 3 October 2014
Slopping a bit of colour about
This is my first attempt at posting to blogger from a tablet so we'll see if it works or not.
Some things never leave you. Drybrushing, for example: it doesn't matter how long it's been since your last session, once you've got it, you've got it. It annoys me that you have to learn brush control all over again; it's like the fine motor control has slipped out of your muscle memory.
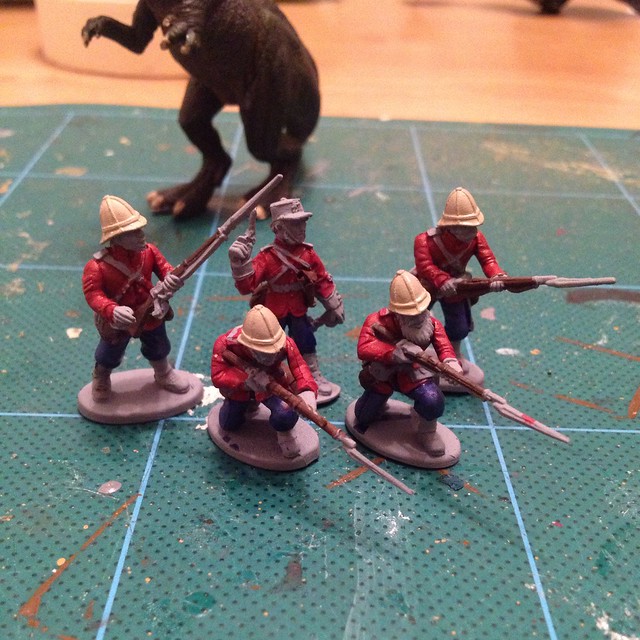
Anyway, my first bit of painting since the birth of the eldest nearly three years ago went... Well, as well as could be expected, really. I got the base colours blocked on to the valiant chaps of the Prince of Wales Own Volunteers and practiced some shading, blending and Drybrushing on Barney. The main scenic element has been primed as well.
So, here are the boys, the boys to entertain you:
 And here is Barney - awful lighting, but hopefully you can see the texture work.
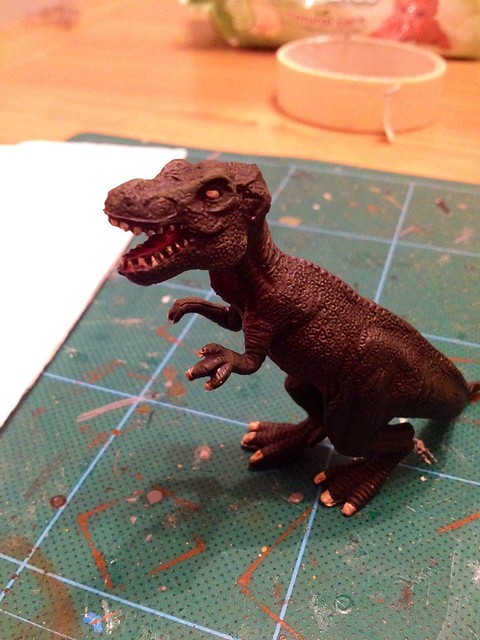 For anyone that's interested, Barney is in fact a 50p dinosaur from our local pound emporium. Don't ask me why he was 50p, I have no idea. About the only place you can really tell is the poor sculpt around the teeth and claws; otherwise the level of detail was very pleasing - although I did have to remove the enormous 'Made In China' mark on his chest (although this has given me a great idea for a Yellow Peril/Fu Manchu vignette somewhere down the line). If my confidence was back to full levels I'd touch up the claws and teeth with green stuff but again, I want to actually get something finished before I do anything more complex.
Tomorrow - my first paint table Saturday, how exciting - I'll do the detail work on the chaps and block in the faces. Then we're in to the first round of shading and highlighting. Annoyingly, I've lost my painting notebook and can't actually remember which way round I liked to do the first lot.
Oh, and I have to mark a couple of sets of exams and source exercises, but I'm sure it'll all work out somehow!
 And here is Barney - awful lighting, but hopefully you can see the texture work.
 For anyone that's interested, Barney is in fact a 50p dinosaur from our local pound emporium. Don't ask me why he was 50p, I have no idea. About the only place you can really tell is the poor sculpt around the teeth and claws; otherwise the level of detail was very pleasing - although I did have to remove the enormous 'Made In China' mark on his chest (although this has given me a great idea for a Yellow Peril/Fu Manchu vignette somewhere down the line). If my confidence was back to full levels I'd touch up the claws and teeth with green stuff but again, I want to actually get something finished before I do anything more complex.
Tomorrow - my first paint table Saturday, how exciting - I'll do the detail work on the chaps and block in the faces. Then we're in to the first round of shading and highlighting. Annoyingly, I've lost my painting notebook and can't actually remember which way round I liked to do the first lot.
Oh, and I have to mark a couple of sets of exams and source exercises, but I'm sure it'll all work out somehow!
Thursday 2 October 2014
The Dark Continent Takes Form
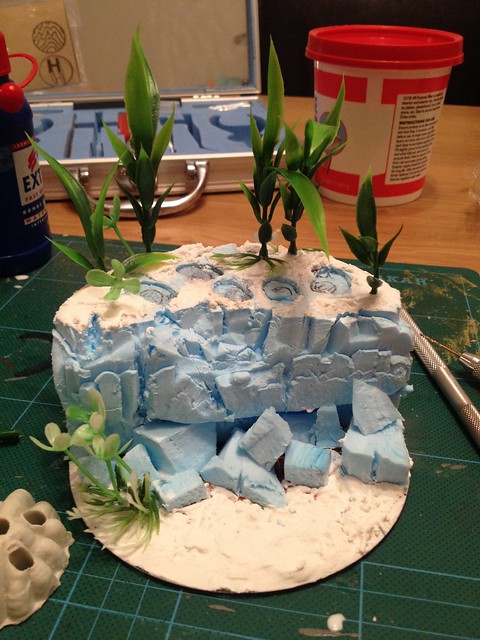
I played around with lots of different ideas for foliage to get that Lost World vibe. I was going to construct some palm trees with wire and fabric, a technique I'd had some success with in the past; but I decided that it was more important for me to get the first thing actually finished to get the mojo flowing. So, thanks to Dave (@thefrugalgamer) who reminded me of aquarium plants, I popped onto the Bay of E and awaited delivery.
A bit of chopping and sticking has started to give me a pretty good bit of visual interest to frame the figures on the ridge:
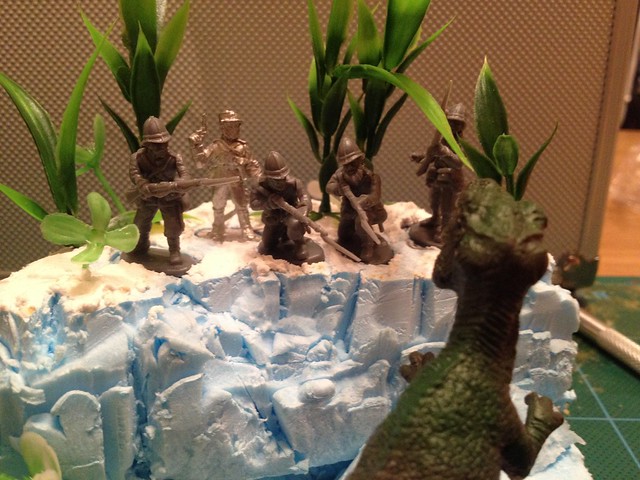
 And with the valiant chaps of the Prince of Wales Own Volunteers in place, facing the monstrous spawn of the Dark Continent:
 So tomorrow it's time to dip the brush into the wet stuff. I'm intending to start easy by working on Barney do I can get back into the swing of blending. My plan is to do the whole thing with a rather muted, realistic palette to really make the redcoats pop.
Of course, I might ditch that and go for one of the more garish recent suggestions for what a tyrannosaur might have looked like...
 And with the valiant chaps of the Prince of Wales Own Volunteers in place, facing the monstrous spawn of the Dark Continent:
 So tomorrow it's time to dip the brush into the wet stuff. I'm intending to start easy by working on Barney do I can get back into the swing of blending. My plan is to do the whole thing with a rather muted, realistic palette to really make the redcoats pop.
Of course, I might ditch that and go for one of the more garish recent suggestions for what a tyrannosaur might have looked like...
Semper Fidelis
I've been painting and gaming for a very long time now. My bits and pieces of kit have followed me to university and through several house moves since. Brushes have come and gone, armies been bought, painted, sold or swapped and game loved then forgotten - but through it all, there has been one faithful servant:
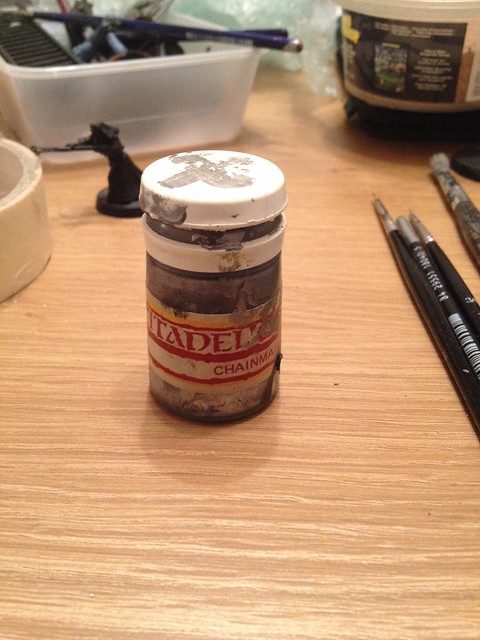
I bought that when I was 15. It's still liquid, still usable. Eeh, them were the days. Made to last, stuff were then. But it does make me wonder... is there anyone else out there still using the original Citadel paints after all these years?

I bought that when I was 15. It's still liquid, still usable. Eeh, them were the days. Made to last, stuff were then. But it does make me wonder... is there anyone else out there still using the original Citadel paints after all these years?
Subscribe to:
Posts (Atom)