The blog has been very quiet of late, mainly because I've been doing more online roleplaying that painting or modelling during the lockdown. The urge to make things, however, was always too strong so I started looking for a new project. When I got back into the habit a few years ago, I started by making dioramas and fancied getting back to that.
Book nooks also known as shelf inserts, are mini dioramas placed between books on your shelf. The idea is to create an illusion of depth and a miniature world.
Perfect!
The basic design for mine was based on Warhammer Fantasy Roleplay - one of my favourite RPGs and one of the ones I've been playing during lockdown. As per usual, I started with a sketch:
Because I'm not at work for another couple of weeks, I didn't have access to the laser cutter so I bought the basic framework from ebay. Once it arrived, I transferred the structure sketch to the inside
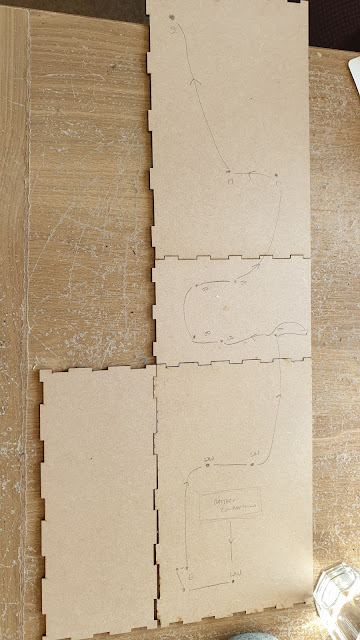
I had a pretty clear idea of what I wanted the lighting to look like so started working on the circuit layout on the outside.
Quick bit of the old maths to work out the correct resistor and a swift circuit test
Then use the router on the dremel to chase the cable runs on the outside. On the final pieces these will be covered in electrical tape.
For the street I used some leftover tiles from
the dungeon project
Then started construction on the walls; here we see the noble coffee-stirrer pressed into use as planking.
Brickwork was simply scribed into blue foam with a pencil; the occasional brick was then pushed in with a bit of wood or gently rounded with the end of the pencil. This created a pleasingly random texture and emphasised the 3d nature of what is, to all intents and purposes, a stage flat.
Coffee stirrers were added to create the beamwork. The big advantage of coffee stirrers is that they are very strong, added a great deal of stability to your models, but also that they are very uniform. It cuts down the measuring time significantly.
The same proceedure started on the other side
Constant dry fitting allows me to check that there aren't any nasty gaps but also that the look is right.
The fit of the false back wall was difficult to get right. In some book nooks these are angled mirrors to create a lot of depth, but I couldn't find a mirror the right size.
Here you can see the different levels of the bricks. I've also added the steps to the door of the pub.
The upper stories were simply boxes made out of thick card (actually the lovely card from the back of A4 lined paper packs). I just measured the plan and drew a net on the card. Cut, score, fold and glue.
Adding coffee stirrers for the beams finishes them off. It's worth pointing out that I measure the coffee stirrers by eye to end up with a slightly rough, uneven look. If you look at any surviving tudor or medieval building (I'm thinking especially of the Shambles in York or several around Chester) you'll notice that the angles are never quite square. So sloppiness here adds a feeling of reality.
The door was made from balsa plank, into which I scribed planking. The structural bars are from a coffee stirrer cut in half lengthways.
Door frames and window frames, because they're so fiddly, were cut from balsa plank. Matchsticks do just as well but this way was slightly less uniform.
Here's the basic construction, sans roofing.
And the street level view, showing some more balsa blank used to create the fence in the alleyway.
Next up, the roofing and then painting. Once we've got the painting and weathering done, then the basic shell can be closed up and the lighting installed. Finally, the miniatures will be able to be added.
Stay tuned!


This looks excellent already, waiting with expectation for the finished result.
ReplyDeleteThank you. I'm really happy with the final result.
DeleteThat looks brilliant - tempted to try one myself, esp with the tip that you can buy the frames on ebay
ReplyDeleteIt really quick and easy to do once you've got the frame.
DeleteWow, fantastic!! Can't wait to see it finished!
ReplyDeleteThanks!
Delete